Keep your aquarium clean and healthy with our comprehensive guide. Learn about the essential equipment, step-by-step cleaning process, and tips for preventing common problems.
Equipment for Cleaning an Aquarium
Cleaning an aquarium is an essential task to maintain the health and well-being of your aquatic pets. To make this task easier and more effective, it is important to have the right equipment at hand. In this section, we will explore the various tools that can help you keep your aquarium clean and pristine.
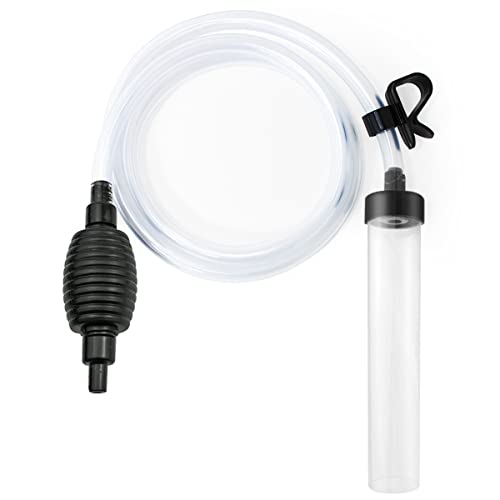
Gravel Vacuum
A gravel vacuum is a must-have tool for any aquarium owner. It allows you to remove debris and waste that accumulates in the gravel bed of your aquarium. This debris, if left unattended, can lead to poor water quality and harmful bacteria growth. The gravel vacuum works by creating a siphon that sucks up the debris while leaving the gravel behind.
Using a gravel vacuum is quite simple. Start by placing one end of the vacuum in a bucket and submerge the other end in the aquarium water. Once the siphon is established, gently move the vacuum over the gravel, allowing it to pick up any waste. Take care not to disturb the gravel too much, as it may cause cloudiness in the water. Regular use of a gravel vacuum will help maintain a clean and healthy aquarium environment for your fish.
Algae Scrubber
Algae is a common problem in aquariums, and an algae scrubber can be a valuable tool in combating its growth. This device is designed to remove algae from the glass walls of your aquarium, keeping it clean and clear. Algae scrubbers usually consist of a handle with a scrubbing pad or brush attached to it.
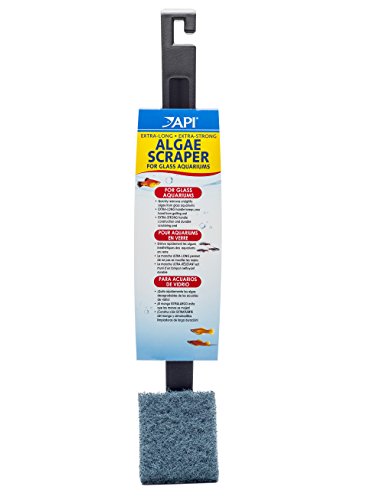
To use an algae scrubber, simply dip the pad or brush in water and gently scrub the glass walls of your aquarium. Make sure to cover all areas where algae is present, including corners and hard-to-reach spots. Regularly cleaning the glass with an algae scrubber not only improves the visual appeal of your aquarium but also helps maintain good water quality.
Glass Cleaner
In addition to an algae scrubber, a glass cleaner specifically designed for aquariums can be a useful tool. This cleaner is formulated to remove stubborn stains, mineral deposits, and fingerprints from the glass surfaces of your aquarium. It is important to use a cleaner specifically made for aquariums, as household cleaners may contain harmful chemicals that can harm your fish.
To use a glass cleaner, spray it onto a soft cloth or sponge and gently wipe the glass surfaces. Take care not to apply too much pressure, as it may scratch the glass. Regular use of a glass cleaner will help keep your aquarium looking crystal clear and free from unsightly blemishes.
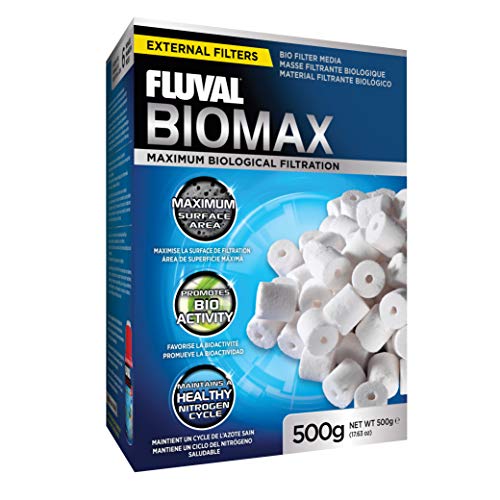
Filter Media
The filter in your aquarium plays a crucial role in maintaining water quality by removing impurities and waste. To ensure its optimal performance, it is important to regularly clean and replace the filter media.
Filter media refers to the materials that are placed inside the filter to trap debris and provide a surface for beneficial bacteria to grow. Common types of filter media include activated carbon, ceramic rings, and filter sponges. Each type of media serves a specific purpose in the filtration process.

To clean filter media, rinse it thoroughly in aquarium water. Avoid using tap water, as it may contain chlorine or other chemicals that can harm the beneficial bacteria. If the filter media becomes too dirty or worn out, it is recommended to replace it with new media to maintain the efficiency of your aquarium filter.
Steps to Clean an Aquarium
Keeping your aquarium clean is essential for the health and well-being of your fish and the overall aesthetics of the tank. Regular maintenance not only ensures a visually appealing aquarium but also helps maintain water quality. In this section, we will guide you through the step-by-step process of cleaning your aquarium.
Removing and Cleaning Decorations
Decorations in your aquarium not only add beauty but also provide hiding spots for your fish. However, over time, these decorations can accumulate dirt and debris. Here’s how you can effectively clean them:
- Remove decorations: Carefully take out the decorations from the tank, ensuring you don’t disturb the fish or damage any delicate plants.
- Inspect for dirt and algae: Check each decoration for signs of dirt, algae, or any other buildup. Pay close attention to crevices and corners where debris tends to accumulate.
- Rinse with water: Use a gentle stream of water to rinse off the decorations. Avoid using any soap or cleaning agents, as they can harm the delicate balance of your aquarium.
- Scrub if necessary: If you notice stubborn algae or dirt, you can use a soft-bristled brush or a toothbrush to gently scrub the affected areas. Be cautious not to scratch or damage the decorations.
- Dry thoroughly: After cleaning, allow the decorations to air dry completely before placing them back in the tank. This helps prevent any residual moisture that could lead to the growth of harmful bacteria.
Vacuuming the Gravel
The gravel in your aquarium acts as a natural filter, trapping debris, uneaten food, and fish waste. Regular gravel vacuuming is crucial to maintain a clean and healthy environment for your fish. Here’s how you can effectively vacuum the gravel:
- Select a gravel vacuum: Choose a gravel vacuum that is suitable for the size of your tank. These devices typically consist of a siphon tube connected to a hose or bucket.
- Prepare the equipment: Place one end of the gravel vacuum into the aquarium, ensuring it reaches the bottom of the tank. Position the other end into a bucket or sink to collect the water.
- Start the siphon: Once the equipment is set up, initiate the siphon action by either sucking on the tube or using a priming mechanism, depending on the type of gravel vacuum you have.
- Vacuum the gravel: Gently move the vacuum over the gravel, allowing it to draw up any debris or waste. Focus on areas where waste tends to accumulate, such as near decorations or under plants.
- Monitor the water level: Keep an eye on the water level in the tank as you vacuum. Make sure not to remove more than 25% of the total water volume during this process.
- Replace the water: If you notice that the water being siphoned out is murky or dirty, you may consider replacing it with fresh, dechlorinated water after completing the gravel vacuuming.
Cleaning the Glass
The glass walls of your aquarium provide a clear view of your underwater world. However, they can quickly become covered in algae and other deposits, impairing your view. Follow these steps to clean the glass effectively:
- Gather the necessary tools: Before starting, gather a clean, non-abrasive sponge or algae scraper, a bucket of clean water, and a magnetic glass cleaner if you have a larger tank.
- Remove loose debris: Use the sponge or algae scraper to remove any loose algae or debris from the glass. Be gentle to avoid scratching the glass surface.
- Scrub the glass: If there are stubborn algae spots, dampen the sponge with water and gently scrub the affected areas. Avoid using any harsh chemicals or abrasive materials.
- Rinse and wipe: Dip the sponge in the clean water bucket and rinse off any residue from the glass. Wipe it dry with a clean, lint-free cloth or paper towel.
- Consider a magnetic glass cleaner: For larger tanks, a magnetic glass cleaner can be a convenient option. Simply move the outer magnet along the glass surface while the inner magnet follows on the inside, effectively removing algae without getting your hands wet.
Changing the Filter Media
The filter media in your aquarium plays a vital role in by removing impurities and harmful substances. Regularly changing the filter media ensures the efficiency of your filtration system. Follow these steps to replace the filter media:
- Turn off the filter: Before beginning, switch off the aquarium filter to prevent water from flowing during the media replacement.
- Locate the filter compartment: Depending on the type of filter you have, locate the compartment where the filter media is housed. It is usually accessible from the top or side of the filter.
- Remove the old filter media: Carefully take out the old filter media, ensuring not to disrupt the beneficial bacteria colonies that may have formed on it. If you are uncertain, consult the manufacturer’s instructions for guidance.
- Clean or replace the filter sponge: If your filter uses a sponge, rinse it gently in dechlorinated water to remove any debris. If it is heavily soiled or damaged, consider replacing it with a new one.
- Insert new filter media: Place the new filter media, such as activated carbon or filter pads, in the designated compartment. Follow the manufacturer’s instructions for specific placement and orientation.
- Restart the filter: Once the new media is in place, switch the filter back on and ensure that it is functioning correctly. Monitor the water flow and check for any leaks.
Regularly cleaning and maintaining your aquarium is a crucial part of responsible fishkeeping. By following these steps to clean your aquarium, you can ensure a healthy and visually appealing environment for your aquatic companions. Remember to perform regular water changes and monitor water parameters to maintain optimal water quality.
Maintaining Water Quality in an Aquarium
Aquarium enthusiasts understand the importance of to ensure the health and well-being of their fish and other aquatic life. By actively monitoring and managing water parameters, performing regular water changes, adopting proper feeding techniques, and controlling algae growth, you can create a thriving aquatic environment that promotes the longevity of your finned friends.
Testing Water Parameters
Regularly testing the water parameters of your aquarium is crucial for maintaining a healthy aquatic ecosystem. By understanding the chemical composition of the water, you can identify any imbalances or potential issues that may arise. Some key parameters to monitor include pH levels, ammonia, nitrite, nitrate, and temperature.
To test these parameters, you can use various test kits available in the market. Follow the instructions provided with the test kit to obtain accurate results. Record your readings in a logbook or digital spreadsheet to track any changes over time. By keeping a record, you can quickly identify any trends or deviations from the optimal range and take appropriate actions.
Regular Water Changes
Performing regular water changes is essential for in your aquarium. Over time, waste products, excess nutrients, and other substances can accumulate, leading to an unhealthy environment for your aquatic pets. By replacing a portion of the water, you effectively dilute these harmful substances and refresh the overall water quality.
The frequency and volume of water changes depend on various factors, such as the size of your aquarium, the number and type of fish, and the filtration system in place. As a general guideline, a 25% water change every two weeks is recommended. However, closely monitoring your water parameters can help you determine if more frequent or larger water changes are necessary.
During a water change, it is important to treat the fresh water with a dechlorinator to remove any chlorine or chloramine that may harm your fish. Additionally, gently vacuuming the substrate during the water change helps remove debris and waste that may have settled on the gravel. This promotes a clean and healthy environment for your aquatic inhabitants.
Proper Feeding Techniques
Feeding your fish is not just about providing sustenance; it also plays a crucial role in . Overfeeding can lead to excessive waste and an increase in ammonia and nitrate levels, which can be harmful to your fish. It is important to adopt proper feeding techniques to ensure the well-being of your aquatic pets.
When feeding, it is recommended to offer small amounts of food that can be consumed within a few minutes. This prevents any excess food from sinking to the bottom and decomposing, contributing to poor water quality. Observing your fish during feeding can help you gauge the appropriate amount of food needed.

Additionally, consider providing a balanced diet that meets the nutritional needs of your fish. Different species have different dietary requirements, so it is important to research and provide suitable food options. Some fish may require a combination of dry pellets, frozen or live foods, and even vegetables. Varied diets not only promote better health but also reduce the risk of nutritional deficiencies.
Controlling Algae Growth
Algae growth is a common challenge faced by many aquarium owners. While some algae can be beneficial, excessive algae growth can disrupt the balance of your aquarium and negatively impact water quality. By implementing effective algae control methods, you can maintain a visually appealing aquarium while ensuring optimal water conditions for your fish.
One of the key factors contributing to algae growth is excessive light exposure. Consider adjusting the duration and intensity of light provided to your aquarium. Most fish require around 8-12 hours of light per day, while live plants may require slightly longer. By using a timer to regulate the lighting schedule, you can prevent excessive algae growth.
Another effective method to control algae is maintaining a proper nutrient balance. Algae thrive in environments with excess nutrients, such as nitrate and phosphate. Regular water changes, as mentioned earlier, help remove these excess nutrients. Additionally, using high-quality filtration systems and adding live plants can also help absorb nutrients and reduce algae growth.
It is important to note that completely eliminating algae from your aquarium is not necessary or recommended. Some algae can provide food and shelter for certain fish species. However, keeping algae growth under control helps maintain a visually pleasing aquarium and ensures that algae do not outcompete other beneficial aquatic plants.
Preventing Common Aquarium Problems
Owning an aquarium can be a rewarding and enjoyable experience. However, like any hobby, it comes with its own set of challenges. Understanding how to prevent common aquarium problems is crucial in maintaining a healthy and thriving aquatic environment for your fish and other inhabitants. In this section, we will explore effective methods for controlling algae, preventing ammonia spikes, avoiding overfeeding, and the importance of quarantining new fish.
Algae Control Methods
Algae growth is a common concern for aquarium owners. While some algae is normal and can even be beneficial for the tank, excessive growth can be unsightly and harmful to the overall health of the aquarium. There are several effective methods for controlling algae:
- Maintain proper lighting: Algae thrives in bright light, so it’s important to ensure that your aquarium receives the appropriate amount of light for the specific needs of your fish and plants. Avoid leaving the lights on for extended periods and consider using a timer to regulate the lighting schedule.
- Monitor nutrient levels: Algae growth is often fueled by excess nutrients in the water, such as nitrates and phosphates. Regularly test your water parameters and take steps to reduce nutrient levels if necessary. This can include regular water changes, using a high-quality filtration system, and avoiding overfeeding.
- Introduce algae-eating organisms: Certain fish, snails, and shrimp species are known for their ability to consume algae. Adding these organisms to your aquarium can help keep algae growth in check. Some popular options include Siamese algae eaters, nerite snails, and Amano shrimp.
- Scrub and clean: Regularly cleaning the glass, decorations, and other surfaces in your aquarium can help prevent algae from taking hold. Use a dedicated algae scrubber or a soft brush to gently remove any visible algae. Be careful not to disturb the fish or disrupt the tank’s ecosystem while cleaning.
Preventing Ammonia Spikes
Ammonia spikes can be detrimental to the health of your aquarium inhabitants. Ammonia is produced through fish waste and decaying organic matter, and high levels can lead to stress, illness, and even death. Here are some tips for preventing ammonia spikes:
- Establish a nitrogen cycle: The nitrogen cycle is a biological process that converts toxic ammonia into less harmful substances. It is essential to establish a healthy nitrogen cycle in your aquarium by introducing beneficial bacteria that will break down ammonia into nitrites and eventually into nitrates. This process can take several weeks, so be patient and monitor your water parameters regularly.
- Avoid overstocking: Overcrowding your aquarium with too many fish can lead to an imbalance in the nitrogen cycle and result in higher ammonia levels. Research the specific needs and compatibility of your fish species and ensure that you provide adequate space and filtration for them.
- Regular water testing: Monitoring ammonia levels is crucial in preventing spikes. Test your water regularly using a reliable aquarium test kit and take appropriate action if ammonia levels are elevated. This may include partial water changes or adding ammonia-removing products.
- Proper feeding and waste management: Overfeeding your fish can lead to excess waste, which in turn can increase ammonia levels. Feed your fish only the amount they can consume within a few minutes and remove any uneaten food promptly. Additionally, vacuum the gravel regularly to remove accumulated waste and debris.
Avoiding Overfeeding
Overfeeding is a common mistake made by many aquarium owners. It can lead to a variety of issues, including poor water quality, increased ammonia levels, and stress on the fish. Here are some tips to avoid overfeeding:
- Follow a feeding schedule: Establish a regular feeding schedule for your fish and stick to it. Feed them small, appropriate portions at designated times rather than continuously throughout the day.
- Observe feeding behavior: Pay attention to how quickly your fish consume their food. If they finish it within a minute or two, it is likely that you are providing the right amount. However, if there is excess food floating around or sinking to the bottom, you may be overfeeding.
- Provide varied and balanced diet: Offer your fish a diverse diet that meets their nutritional needs. This can include a combination of high-quality flake or pellet food, frozen or live foods, and occasional treats. Consult with a knowledgeable aquarium professional to determine the specific dietary requirements of your fish species.
- Remove uneaten food: Any food left uneaten after a few minutes should be promptly removed from the tank. This will prevent it from decomposing and causing water quality issues.
Quarantining New Fish
Introducing new fish to your aquarium can be exciting, but it also carries a risk of introducing diseases or parasites. Quarantining new fish before adding them to your main tank is a crucial step in preventing potential problems. Here’s how to effectively quarantine new fish:
- Set up a quarantine tank: Prepare a separate aquarium specifically for quarantining new fish. This tank should be equipped with filtration, heating, and appropriate hiding places for the fish.
- Observe and monitor: Keep the new fish in quarantine for a minimum of two weeks, closely observing their behavior and health. Look for any signs of illness, such as abnormal swimming patterns, loss of appetite, or visible parasites. Treat any issues promptly with appropriate medications or seek advice from a veterinarian specializing in aquatic animals.
- Maintain water quality: Just like your main tank, it’s essential to maintain optimal water quality in the quarantine tank. Regularly test the water parameters and perform partial water changes as needed. This will help ensure that the fish are not exposed to stressful or harmful conditions.
- Gradual acclimation: Before transferring the quarantined fish to the main tank, it’s important to acclimate them slowly to the new environment. This can be done by gradually adding small amounts of water from the main tank to the quarantine tank over a period of several hours. This process helps the fish adjust to the water parameters of the main tank and reduces the risk of shock.
By implementing these preventive measures, you can minimize the occurrence of common aquarium problems and provide a healthy and thriving habitat for your aquatic pets. Remember, prevention is always better than cure when it comes to maintaining an aquarium.
Cleaning Aquarium Accessories
When it comes to maintaining a clean and healthy aquarium, it’s not just about the fish and the water. Keeping the accessories in your aquarium clean is just as important. In this section, we will explore how to properly clean the various accessories in your aquarium, from filter components to air stones, heater, and lighting fixtures.
Cleaning Filter Components
The filter is an essential component of any aquarium, as it helps to remove debris and maintain water quality. Over time, the filter components can become clogged with dirt and waste, reducing their effectiveness. Cleaning the filter components regularly is crucial for optimal performance.
To clean the filter components, follow these simple steps:
- Switch off the filter: Before you start cleaning the filter components, make sure to switch off the filter and unplug it from the power source. This will ensure your safety and prevent any damage to the filter.
- Remove the filter media: Take out the filter media, such as sponges, carbon cartridges, or bio-balls, and rinse them under running water. Avoid using tap water, as it may contain chlorine or other harmful chemicals. Gently squeeze the media to remove any trapped debris.
- Clean the filter housing: Once the media is removed, clean the filter housing using a soft brush or sponge. Scrub away any algae or dirt buildup, paying special attention to the impeller and other moving parts. Rinse the housing thoroughly to remove any residue.
- Reassemble the filter: After cleaning, reassemble the filter components according to the manufacturer’s instructions. Make sure all the parts are securely in place before switching the filter back on.
Regularly cleaning the filter components will ensure that the water in your aquarium remains clear and free from harmful substances. It will also prolong the life of your filter, saving you money in the long run.
Maintaining Air Stones
Air stones play a vital role in aquariums by providing aeration and circulation, which is essential for the health of the fish and other aquatic creatures. Over time, air stones can become clogged with mineral deposits and algae, hindering their ability to produce fine bubbles. Cleaning and maintaining air stones is essential for optimal performance.
To clean and maintain your air stones, follow these steps:
- Remove the air stone: Carefully remove the air stone from the aquarium. Be gentle to avoid damaging the delicate structure.
- Soak in a cleaning solution: Prepare a cleaning solution by mixing equal parts water and vinegar or hydrogen peroxide. Place the air stone in the solution and let it soak for about 30 minutes. These solutions will help dissolve any mineral deposits and kill algae.
- Scrub and rinse: After soaking, gently scrub the air stone with a soft brush or toothbrush to remove any remaining debris. Rinse the air stone thoroughly under running water to ensure all traces of the cleaning solution are removed.
- Reinstall the air stone: Once the air stone is clean and rinsed, reinstall it in the aquarium. Make sure it is properly connected to the air pump and positioned in a way that allows for optimal aeration and circulation.
Regularly cleaning and maintaining your air stones will ensure that your aquarium’s water is properly oxygenated, promoting the health and well-being of your fish and other aquatic inhabitants.
Cleaning the Heater
The heater in your aquarium is responsible for maintaining a stable and comfortable temperature for your fish. Over time, mineral deposits and algae can accumulate on the heater, affecting its efficiency. Regularly cleaning the heater is essential for its proper functioning.
To clean the heater, follow these steps:
- Switch off and unplug the heater: Before cleaning the heater, switch it off and unplug it from the power source. This will prevent any accidents and ensure your safety.
- Remove the heater from the water: Carefully remove the heater from the aquarium. Make sure to handle it with care to avoid any damage.
- Wipe off debris: Use a soft cloth or sponge to wipe off any debris or algae from the surface of the heater. Avoid using abrasive materials that could scratch or damage the heater.
- Clean the contacts: If the heater has metal contacts, clean them using a soft brush or toothbrush. Gently scrub away any mineral deposits or residue that may have accumulated.
- Rinse and dry: Rinse the heater under running water to remove any remaining debris. Once cleaned, allow the heater to air dry completely before reinserting it into the aquarium.
Regularly cleaning the heater will ensure that it functions efficiently and maintains a stable temperature in your aquarium, providing a comfortable environment for your fish.
Cleaning Lighting Fixtures
Proper lighting is not only essential for the aesthetic appeal of your aquarium but also for the health and well-being of your fish and plants. Over time, dust, algae, and other debris can accumulate on the lighting fixtures, reducing their effectiveness. Regularly cleaning the lighting fixtures will help maintain optimal lighting conditions in your aquarium.
To clean the lighting fixtures, follow these steps:
- Switch off and unplug the lights: Before cleaning the lighting fixtures, switch off and unplug them from the power source. This will ensure your safety and prevent any damage to the lights.
- Remove the light covers: If your lighting fixtures have removable covers, carefully remove them. Place the covers in a sink or basin filled with warm, soapy water.
- Clean the covers: Using a soft cloth or sponge, gently scrub the covers to remove any dust, algae, or debris. Rinse them thoroughly under running water to remove any soap residue.
- Clean the bulbs: If the bulbs are easily accessible, use a soft cloth or microfiber cloth to gently wipe away any dust or debris. Avoid touching the bulbs with bare hands, as the oils from your skin can affect their lifespan.
- Reinstall the covers: Once the covers are clean and dry, reinstall them onto the lighting fixtures. Make sure they are securely in place before switching the lights back on.
Regularly cleaning the lighting fixtures will ensure that your aquarium is adequately illuminated, creating a visually appealing and healthy environment for your aquatic life.
In this section, we have explored the importance of cleaning various aquarium accessories, including filter components, air stones, heaters, and lighting fixtures. By following these cleaning guidelines, you can maintain a clean and healthy aquarium for the enjoyment of both you and your aquatic inhabitants. Remember to regularly clean these accessories to ensure their optimal performance and longevity.