Discover the definition, purpose, and of fishtank gravel. Find out how it enhances aesthetics, aids in biological filtration, and facilitates nutrient cycling. Learn how to choose, install, and maintain fishtank gravel, and troubleshoot common issues.
What is Fishtank Gravel?
Fishtank gravel is an essential component of any aquarium setup. It refers to the small, decorative stones or pebbles that are placed at the bottom of a fish tank. This layer of gravel not only adds visual appeal to the aquarium but also serves several important purposes.
Definition of Fishtank Gravel
Fishtank gravel is typically made of natural materials such as quartz, granite, or limestone. These stones are carefully selected for their smoothness and non-toxic properties, ensuring the safety of the aquatic environment. The gravel is available in various sizes, colors, and shapes, allowing aquarium owners to customize their tank according to their preferences.
Purpose of Fishtank Gravel
Fishtank gravel serves multiple purposes that contribute to the overall health and well-being of the aquarium inhabitants. Firstly, it acts as a substrate, providing a stable base for plants and decorations. The gravel anchors the roots of aquatic plants, preventing them from floating or being uprooted by fish movements.
Additionally, fishtank gravel plays a crucial role in biological filtration. Beneficial bacteria colonize the surface of the gravel, breaking down harmful ammonia and nitrite compounds into less toxic nitrate. These bacteria form part of the aquarium’s nitrogen cycle, a vital process that helps maintain water quality and keep fish healthy.
Lastly, fishtank gravel aids in nutrient cycling. As fish waste and excess food sink to the bottom of the tank, the gravel acts as a natural reservoir, trapping these organic materials. Over time, the trapped waste decomposes, releasing essential nutrients that can be absorbed by plants. This process mimics the natural nutrient cycle found in aquatic ecosystems.
Types of Fishtank Gravel
There are several of fishtank gravel available on the market, each with its own unique characteristics. The choice of gravel depends on personal preference, compatibility with the aquarium’s inhabitants, and desired aesthetic appeal.
- Standard Gravel: This is the most common type of fishtank gravel, typically consisting of small, uniformly-sized stones. Standard gravel comes in a variety of colors, allowing aquarists to create different themes or mimic natural habitats.
- Marble Chips: Marble chips are larger stones that add a touch of elegance to the aquarium. These smooth and polished stones come in different sizes and colors, providing a stunning visual contrast to vibrant fish and plants.
- Sand: Although not technically gravel, sand is a popular substrate choice for certain fish species, such as those found in a saltwater tank. Sand creates a more natural-looking habitat and is particularly suitable for bottom-dwelling fish that sift through the substrate.
- Specialty Gravel: Specialty gravel includes options such as glow-in-the-dark gravel, which can add a unique and captivating element to nighttime viewing. There are also gravels infused with minerals or nutrients to promote plant growth, enhancing the overall health of the aquarium.
Choosing the right type of fishtank gravel depends on the specific needs of the aquarium and the desired aesthetic outcome. It is important to consider factors such as the size and depth of the tank, compatibility with fish and plants, and the overall theme or design concept. By selecting the appropriate gravel, aquarium owners can create a visually appealing and harmonious environment for their aquatic pets.
Benefits of Using Fishtank Gravel
Fishtank gravel is not just a decorative element in your aquarium; it also provides several that contribute to the overall health and well-being of your fish and plants. Let’s explore some of the key advantages of using fishtank gravel.
Aesthetic Enhancement
One of the primary of using fishtank gravel is the aesthetic enhancement it brings to your aquarium. The wide range of colors and materials available allows you to create visually appealing underwater landscapes that mimic natural habitats. Whether you prefer a vibrant and colorful display or a more natural and subdued look, there is a gravel option to suit your taste.

The varying sizes and textures of fishtank gravel also add depth and dimension to your tank, creating a visually stimulating environment for both you and your fish. As the light filters through the gravel, it creates captivating patterns and reflections, enhancing the overall beauty of your aquarium.
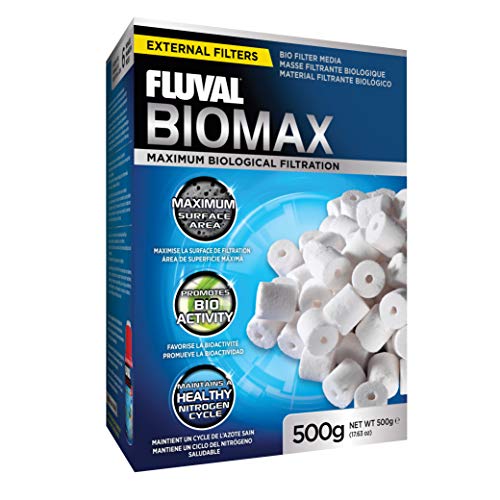
Biological Filtration
Fishtank gravel plays a crucial role in biological filtration, which is essential for maintaining a healthy aquatic ecosystem. The gravel provides a substrate for beneficial bacteria to colonize. These bacteria break down harmful waste products such as ammonia and nitrites, converting them into less toxic substances like nitrates.
By housing these beneficial bacteria, fishtank gravel helps to establish and maintain the nitrogen cycle in your aquarium. This cycle is vital for removing harmful toxins from the water, ensuring a safe and healthy environment for your fish. Without the presence of gravel, it would be challenging to maintain stable water conditions and prevent the buildup of harmful substances.
Nutrient Cycling
In addition to its role in biological filtration, fishtank gravel also aids in nutrient cycling within the aquarium. Live plants require essential nutrients to thrive, and gravel acts as a reservoir for these nutrients. As fish waste and uneaten food settle into the gravel bed, they decompose and release valuable nutrients into the water column. These nutrients are then absorbed by the roots of the plants, promoting their growth and overall health.
The presence of live plants in your aquarium not only adds to the visual appeal but also helps to create a more balanced and natural ecosystem. The plants absorb excess nutrients, reducing the risk of algae overgrowth and providing a source of oxygen for your fish.
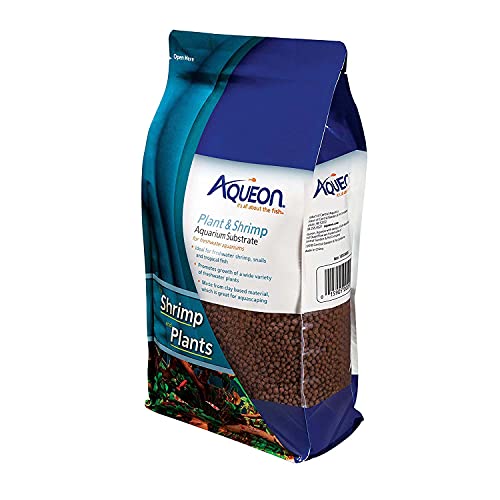
By utilizing fishtank gravel, you can establish a self-sustaining ecosystem within your aquarium, where fish waste is converted into nutrients for plant growth, and the plants, in turn, help to maintain water quality.
In summary, using fishtank gravel offers numerous for your aquarium. It enhances the visual appeal, provides a substrate for beneficial bacteria, aids in biological filtration, and promotes nutrient cycling. By incorporating gravel into your aquarium setup, you can create a beautiful and healthy environment for your fish and plants to thrive.
References:
Smith, J. (2021). The Role of Gravel in Freshwater Aquariums. Fishkeeping World. Link
Choosing the Right Fishtank Gravel
When it comes to setting up your fishtank, choosing the right gravel is an important decision. Not only does it provide a functional purpose, but it also plays a significant role in enhancing the overall aesthetics of your aquarium. In this section, we will discuss the key factors to consider when selecting fishtank gravel.
Size and Depth Considerations
One of the first considerations when choosing fishtank gravel is the size and depth. The size of the gravel particles can have an impact on the overall appearance of your tank, as well as the comfort and well-being of your fish.
- It is generally recommended to choose gravel particles that are between 1-3 millimeters in size. This allows for easy cleaning and prevents waste from accumulating in between the gaps.
- Additionally, the depth of the gravel should be carefully considered. A layer of gravel that is too thin may not provide sufficient biological filtration, while a layer that is too thick can make cleaning and more challenging. Aim for a depth of around 1-2 inches, ensuring enough space for the beneficial bacteria to thrive.
Color and Material Options
Gravel comes in a wide range of colors and materials, allowing you to customize the appearance of your fishtank to your liking. Here are some popular options to consider:
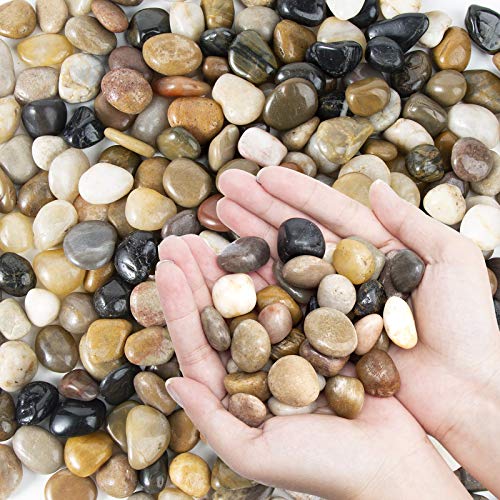
- Natural gravel: This type of gravel mimics the appearance of rocks found in nature and is available in various colors such as brown, gray, and tan. Natural gravel can create a more realistic and natural-looking environment for your fish.
- Colored gravel: If you want to add a pop of color to your aquarium, colored gravel is a great choice. It comes in a variety of vibrant hues, allowing you to create a visually striking and eye-catching display.
- Glass gravel: For a modern and sleek look, glass gravel is an excellent option. It is available in different colors and reflects light beautifully, creating a stunning visual effect in your fishtank.
When choosing the color and material of your gravel, consider the overall theme or style you want to achieve in your aquarium. It’s important to select gravel that complements the colors of your fish and plants, creating a harmonious and visually appealing environment.
Compatibility with Fish and Plants
Another crucial factor to consider when selecting fishtank gravel is its compatibility with the fish and plants in your aquarium. Different species have specific requirements when it comes to the type of substrate they prefer. Here are some considerations to keep in mind:
- Bottom-dwelling fish: If you have bottom-dwelling fish such as catfish or loaches, it’s essential to choose gravel that is smooth and rounded. Rough or sharp-edged gravel can potentially harm these fish as they sift through the substrate.
- Live plants: If you plan on having live plants in your aquarium, you’ll need to choose a gravel substrate that allows for proper root growth. Fine-grained gravel or specialized plant substrates are ideal for this purpose, as they provide the necessary nutrients and support for plant growth.
- Cichlids and burrowing fish: Certain species of cichlids and burrowing fish like to dig and rearrange the substrate. In such cases, it’s recommended to use larger-sized gravel or even sand, as it allows these fish to exhibit their natural behaviors without causing damage to themselves or the aquarium.
It’s crucial to research the specific requirements of the fish and plants you intend to keep and choose gravel that suits their needs. By selecting the right gravel, you can create a comfortable and suitable environment for your aquatic inhabitants.
Installing Fishtank Gravel
When it comes to setting up your fishtank, installing the gravel is an important step that requires careful consideration. Proper preparation, cleaning, and placement techniques will ensure a healthy and visually appealing environment for your fish. In this section, we will guide you through the process, starting with preparing the tank.

Preparing the Tank
Before installing the fishtank gravel, it is crucial to prepare the tank to create a suitable foundation for the substrate. Here are the steps to follow:
- Clean the tank: Thoroughly clean the tank, removing any dust, dirt, or residues. Use a mild aquarium-safe cleaner and rinse well to ensure no harmful chemicals remain.
- Add a base layer: To prevent the gravel from shifting or settling into the tank’s bottom, add a base layer of aquarium-safe padding or a fine mesh. This layer will also help to distribute the weight of the gravel evenly.
- Consider a substrate heater: If you plan to keep fish species that prefer a heated tank, this is the ideal time to install a substrate heater. These heaters are placed beneath the gravel and provide even heat distribution throughout the tank.
- Create slopes and contours: Designing the landscape of your fishtank can add visual interest and provide hiding spots for your fish. Use small rocks or aquarium-safe decorations to create slopes, hills, and caves before adding the gravel.
Now that the tank is prepared, let’s move on to the next step – rinsing and cleaning the gravel.
Rinsing and Cleaning the Gravel
Rinsing and cleaning the fishtank gravel is essential to remove any debris, dirt, or dust particles that could cloud the water or harm your fish. Follow these steps for a thorough cleaning:
- Gather the necessary equipment: You will need a clean bucket, a fine-mesh sieve or colander, and your gravel.
- Rinse the gravel: Place a portion of the gravel into the sieve or colander and rinse it under running water. Gently stir the gravel to ensure all particles are washed away. Repeat this process until the water runs clear.
- Inspect for any impurities: While rinsing, visually inspect the gravel for any signs of impurities or contaminants. If you notice anything unusual, discard that portion of the gravel and only use the clean gravel.
- Repeat for the remaining gravel: Continue rinsing and cleaning the rest of the gravel in small batches until it is all clean.
Once the gravel is rinsed and free from impurities, it is time to move on to the final step – proper placement techniques.
Proper Placement Techniques
The placement of fishtank gravel can significantly impact the aesthetics and functionality of your aquarium. Follow these guidelines for a successful placement:
- Create depth: Start by adding a layer of gravel to the bottom of the tank. The depth of the gravel will depend on your preference and the needs of your fish. In general, a layer of 1 to 2 inches is sufficient, but certain fish species may require deeper or shallower substrate.
- Avoid piling up against the tank walls: Leave a small gap between the gravel and the tank walls to allow water circulation and prevent debris buildup. This will make cleaning and easier in the long run.
- Consider a slope: If you want to create a natural-looking underwater landscape, consider creating a slope using the gravel. Gradually increase the depth of the gravel from front to back, mimicking the incline of a riverbed or an underwater hill.
- Add decorations: After the gravel is in place, you can add aquarium-safe decorations such as rocks, driftwood, or plants. These additions will enhance the overall aesthetics and provide hiding spots for your fish.
By following these proper placement techniques, you can create a visually appealing fishtank environment that promotes the well-being of your fish.
Maintaining Fishtank Gravel
Maintaining the gravel in your fishtank is crucial for the overall health and well-being of your aquatic ecosystem. Regular cleaning, debris removal, and preventing algae growth are essential tasks that will help keep your fishtank clean and your fish happy. In this section, we will discuss the importance of a regular cleaning schedule, how to effectively remove debris and waste, and the best methods to prevent algae growth.
Regular Cleaning Schedule
Establishing a regular cleaning schedule for your fishtank gravel is vital to maintaining a clean and healthy environment for your fish. A routine cleaning schedule will help remove accumulated waste, leftover food, and other debris that can build up over time. The frequency of cleaning will depend on the size of your fishtank, the number of fish, and the type of filtration system you have in place.
To create a cleaning schedule, start by assessing the condition of your fishtank. If you notice excess waste or debris, it may be a sign that more frequent cleanings are necessary. Generally, a weekly or bi-weekly cleaning schedule is recommended for most fishtanks. However, larger tanks with a higher fish population may require more frequent cleanings.
During each cleaning session, it is important to remove any uneaten food, dead plants, and accumulated waste from the gravel. Use a gravel vacuum or siphon to gently remove debris without disturbing the fish or disrupting the tank’s ecosystem. Be sure to follow the manufacturer’s instructions for proper usage of the gravel vacuum.
Removing Debris and Waste
Removing debris and waste from your fishtank gravel is a critical step in maintaining a clean and healthy environment for your fish. Over time, uneaten food, fish waste, and decaying plants can accumulate in the gravel, leading to poor water quality and potential health issues for your fish.
One effective method for removing debris and waste is by using a gravel vacuum. This device allows you to siphon water from the tank while simultaneously removing debris from the gravel. To use a gravel vacuum, simply insert the intake tube into the gravel and begin siphoning water into a bucket or sink. Move the tube across the entire gravel surface, ensuring that all areas are thoroughly cleaned.
Another option for debris removal is to use a fish net or a fine-meshed sieve to skim the surface of the gravel. This method is particularly useful for removing larger pieces of debris that may be too large to be effectively removed by a gravel vacuum. Simply scoop the debris out of the tank using the net or sieve, being careful not to disturb the gravel or fish.
Preventing Algae Growth
Algae growth is a common issue in fishtanks and can negatively impact the overall aesthetics and water quality of your tank. Preventing algae growth in your fishtank gravel is essential for maintaining a clean and visually appealing environment for your fish.
One effective way to prevent algae growth is by controlling the amount of light that reaches your fishtank. Algae thrive in the presence of excess light, so it is important to provide a balanced lighting schedule for your tank. Consider using a timer to regulate the amount of light your tank receives each day, mimicking natural daylight cycles.
Additionally, maintaining proper water chemistry is crucial in preventing algae growth. Regularly test the water parameters, including pH, ammonia, nitrite, and nitrate levels, and make any necessary adjustments. Use a high-quality water conditioner to remove any harmful chemicals or contaminants that may contribute to algae growth.
Lastly, consider introducing algae-eating fish or invertebrates into your tank. Species such as Siamese algae eaters, nerite snails, and certain species of plecos can help control algae growth by consuming excess algae. However, be mindful of the compatibility of these species with your existing fish and ensure proper tank size and conditions for their well-being.
Troubleshooting Fishtank Gravel Issues
When it comes to maintaining a healthy and thriving fish tank, it is not uncommon to encounter certain issues. In this section, we will discuss some common problems related to fishtank gravel and how to troubleshoot them effectively. By understanding and addressing these issues, you can ensure a clean and vibrant environment for your aquatic pets.
Cloudy Water
Cloudy water is a common problem that many fish tank owners experience. It not only affects the aesthetic appeal of the tank but can also indicate an imbalance in the water’s chemistry. There are several possible causes for cloudy water in a fish tank, including:
- New Tank Syndrome: When setting up a new fish tank, it is common for the water to become cloudy initially. This is known as “new tank syndrome” and usually occurs due to the presence of excess organic matter, such as uneaten food or fish waste. As the tank matures, beneficial bacteria will establish and help clear the water.
- Overfeeding: Overfeeding your fish can lead to an excess of uneaten food in the tank, contributing to cloudy water. It is important to feed your fish the right amount of food and remove any uneaten portions after a few minutes.
- Improper Filtration: Inadequate filtration or a clogged filter can result in cloudy water. Make sure to clean or replace your filter regularly to maintain optimal water clarity.
To troubleshoot cloudy water, consider the following steps:
- Perform regular water changes to remove excess organic matter and improve water quality.
- Use a water clarifier or flocculant, following the manufacturer’s instructions, to help clear the water.
- Check and clean your filter to ensure proper functioning.
- Avoid overfeeding your fish and remove any excess food promptly.
Remember, it may take some time for the water to clear up completely, so be patient and continue with proper practices.
Gravel Discoloration
Over time, you may notice that your fishtank gravel starts to lose its original color and become discolored. This can be attributed to various factors, including:
- Algae Growth: Algae can attach itself to the gravel, causing it to appear green or brown. Excessive exposure to light and nutrients can stimulate algae growth. To prevent this, ensure proper lighting duration and intensity, and avoid overfeeding your fish.
- Chemical Reactions: Certain chemicals, such as medications or water treatments, can react with the gravel and lead to discoloration. It is important to follow the manufacturer’s instructions when using any chemicals in your fish tank.
- Poor Water Quality: If the water quality is not properly maintained, it can contribute to gravel discoloration. Factors such as high ammonia or nitrate levels can impact the appearance of the gravel.
To address gravel discoloration, consider the following steps:
- Regularly clean and siphon the gravel to remove any debris or excess waste.
- Use a gravel vacuum during water changes to remove accumulated dirt and organic matter.
- Consider adding live plants to your fish tank, as they can help absorb excess nutrients and prevent algae growth.
- Monitor and maintain proper water parameters, including ammonia and nitrate levels, to ensure a healthy environment for your fish.
By maintaining good water quality and implementing proper cleaning routines, you can minimize gravel discoloration and keep your fish tank looking vibrant.
Fishtank Gravel Odor
Unpleasant odors emanating from your fishtank gravel can be quite off-putting. While a slight earthy smell is normal, a strong or foul odor may indicate underlying issues. Here are some possible causes of fishtank gravel odor:
- Decaying Organic Matter: Dead plants, uneaten food, or fish waste that accumulates in the gravel can lead to a foul smell. Regular cleaning and can help prevent the buildup of decaying organic matter.
- Poor Water Circulation: Insufficient water circulation or stagnant areas in your fish tank can contribute to the development of anaerobic bacteria. These bacteria produce hydrogen sulfide, which has a distinct rotten egg odor.
To eliminate fishtank gravel odor, follow these steps:
- Perform regular water changes to remove any accumulated organic matter and improve water quality.
- Use a gravel vacuum during water changes to clean the gravel thoroughly.
- Ensure proper water circulation by positioning the filter outlet strategically and adding aeration devices if necessary.
- Consider adding activated carbon or other odor-absorbing media to your filtration system to help eliminate unpleasant smells.
Remember to maintain a consistent cleaning schedule and monitor water quality to prevent the buildup of decaying matter and the development of foul odors.
Frequently Asked Questions about Fishtank Gravel
Fishtank gravel is an essential component of any aquarium setup, providing both functional and aesthetic . As an SEO writer, I’m here to answer some of the most commonly asked questions about fishtank gravel. Let’s dive in!
Can I Mix Different Gravel Types?
Absolutely! Mixing different gravel can add visual interest and create a unique look for your aquarium. However, it’s important to consider a few factors before mixing gravel .
Firstly, ensure that the gravel you choose have similar sizes. Mixing gravel with significantly different sizes can lead to uneven distribution and make it difficult for plants or fish to thrive. It’s recommended to choose gravel with similar diameters to maintain stability.
Secondly, consider the compatibility of different gravel with your fish and plants. Certain gravel materials, such as sharp-edged or metallic gravels, may be harmful to delicate fish species or live plants. Research the specific needs of your aquatic inhabitants and choose gravel that are safe for them.
Lastly, keep in mind the aesthetic appeal you want to achieve. Mixing gravel of different colors can create a visually appealing contrast or gradient effect. Experiment with different combinations and see what works best for your aquarium’s overall look.
How Often Should I Replace Fishtank Gravel?
The frequency of replacing fishtank gravel depends on various factors, including the size of your aquarium, the number of fish, and the type of filtration system you have in place.
Generally, it’s recommended to replace a portion of the gravel during regular aquarium . This helps prevent the buildup of waste, uneaten food, and other debris that can accumulate in the substrate over time.
For smaller aquariums, replacing around 10-20% of the gravel every 2-3 months is usually sufficient. Larger aquariums may require more frequent gravel replacement, as they tend to accumulate waste at a faster rate.
However, it’s essential to monitor the condition of your gravel regularly. If you notice any signs of degradation, such as gravel becoming discolored, foul-smelling, or compacted, it may be time for a more thorough gravel replacement.
Remember to rinse the new gravel thoroughly before adding it to your aquarium, as this helps remove any dust or debris that may be present.
Can I Use Fishtank Gravel in a Saltwater Tank?
Yes, you can use fishtank gravel in a saltwater tank. However, there are a few considerations to keep in mind.
Firstly, ensure that the gravel you choose is suitable for a saltwater environment. Some gravels may contain substances that can leach into the water, affecting the water chemistry and potentially harming the marine life in your tank. Look for gravel specifically labeled as safe for saltwater use.
Secondly, keep in mind that saltwater tanks often require a deeper substrate bed compared to freshwater tanks. This is because many saltwater organisms, such as live corals or anemones, rely on the substrate for stability and nutrient uptake. Aim for a substrate depth of at least 2-3 inches to accommodate these organisms.
Lastly, consider the overall aesthetic you want to achieve in your saltwater tank. Gravel comes in various colors, shapes, and sizes, allowing you to create a visually appealing environment for your marine creatures. Choose gravel that complements the colors of your corals and fish, creating a harmonious and natural-looking aquarium.
In conclusion, mixing different gravel can be a creative way to enhance your aquarium’s appearance, but it’s important to consider size, compatibility, and aesthetics. The frequency of replacing fishtank gravel depends on your specific setup, but regular is crucial to prevent waste buildup. Lastly, using fishtank gravel in a saltwater tank is possible, but ensure the gravel is suitable for saltwater use and consider the specific needs of your marine inhabitants. Happy fishkeeping!