Want to clean the sand in your fish tank? Follow our step-by-step guide to learn the tools and techniques needed, as well as maintenance tips and troubleshooting common issues.
Tools and Materials Needed for Cleaning Sand in a Fish Tank
Cleaning the sand in your fish tank is an essential task to maintain a healthy and visually appealing aquatic environment for your fish. To ensure a successful cleaning process, you will need a few tools and materials. Let’s take a look at what you’ll need:
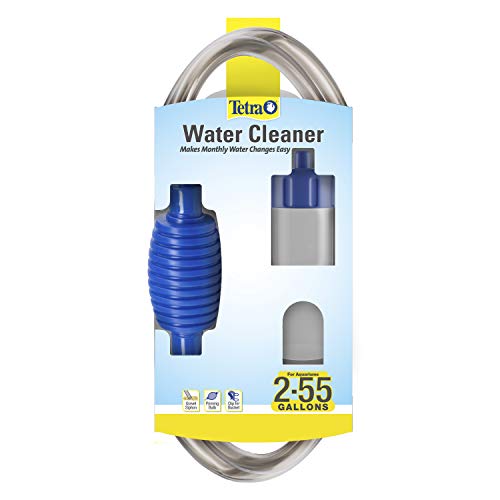
Gravel Vacuum
A gravel vacuum is a must-have tool for cleaning the sand in your fish tank. It is specifically designed to remove debris and waste from the substrate without disturbing the sand itself. The vacuum works by creating a siphon that sucks up the dirt and waste as you move it across the sand. It is important to choose a gravel vacuum that is suitable for your tank size.
Bucket or Container
You will need a bucket or container to collect the water and waste that you remove from the tank during the cleaning process. Make sure the bucket or container is clean and dedicated solely for aquarium use. It is important to avoid using any cleaning chemicals or detergents on the bucket, as they can be harmful to your fish.
Sponge or Brush
A sponge or brush will come in handy when cleaning the sides of the fish tank. Over time, algae and other deposits may accumulate on the glass or acrylic walls, obscuring the view of your fish. Using a sponge or brush, you can gently scrub away these deposits and restore the clarity of the tank. Remember to choose a sponge or brush that is safe for aquarium use and does not contain any harsh chemicals.

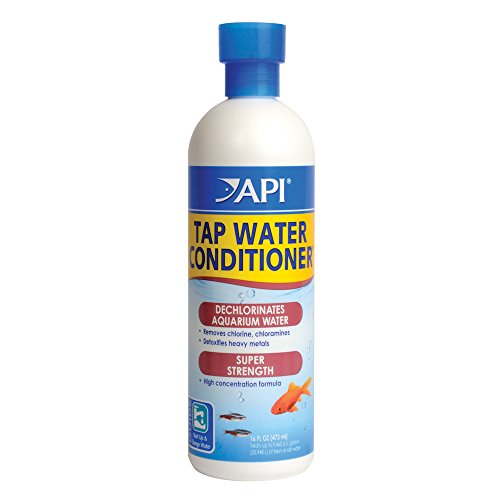
In addition to these tools, it is also important to have clean, fresh water on hand for refilling the tank after cleaning. You may also consider using a water conditioner to remove any chlorine or other harmful substances from the tap water before adding it to the tank.
Now that we have covered the essential tools and materials needed for cleaning the sand in a fish tank, let’s move on to the next section on how to prepare the fish tank for the cleaning process.
Preparing the Fish Tank for Sand Cleaning
Removing Fish and Plants
Before starting the process of cleaning the sand in your fish tank, it is important to remove the fish and plants from the tank. This will ensure their safety and prevent them from getting stressed or injured during the cleaning process. Carefully catch the fish using a net and place them in a separate container with some of the tank water. Similarly, remove any live plants and place them in a separate container filled with water.
Disconnecting Filters and Heaters
To effectively clean the sand in your fish tank, it is necessary to disconnect the filters and heaters. These devices can interfere with the cleaning process and may get damaged if not properly handled. Start by turning off the filters and heaters, and then unplug them from the power source. Carefully remove them from the tank and place them in a safe location, away from any water or moisture.
Draining Water
Once the fish and plants are safely removed and the filters and heaters are disconnected, it is time to drain the water from the fish tank. This step is crucial as it allows you to access the sand and clean it thoroughly. To drain the water, you can use a siphon or a gravel vacuum. Place one end of the siphon or vacuum in the tank and the other end in a bucket or container. Start the siphon or vacuum by either sucking on the end or using a pump. As the water starts to flow, carefully move the siphon or vacuum across the bottom of the tank to remove as much water as possible.
Once the water level in the tank has significantly decreased, you can use a sponge or brush to remove any remaining water from the tank. Gently scrub the sides of the tank to remove any algae or dirt that may have accumulated. Be sure to rinse the sponge or brush regularly to avoid spreading any contaminants back into the tank.
During this process, it is important to be mindful of the fish and plants that may still be in the tank. Avoid disturbing them and be cautious not to damage their delicate fins or leaves. Once the tank is completely drained and free of water, you can move on to the next step of cleaning the sand.
Remember, the key to a successful sand cleaning process is to ensure the safety and well-being of your fish and plants. By removing them from the tank, disconnecting filters and heaters, and draining the water carefully, you are setting the stage for a thorough and effective cleaning process.
Cleaning the Sand in a Fish Tank
When it comes to maintaining a clean and healthy fish tank, cleaning the sand is an essential task. Over time, debris and waste can accumulate in the sand, affecting the water quality and overall well-being of your fish. In this section, we will discuss the step-by-step process of cleaning the sand in your fish tank, including removing debris and waste, stirring the sand, and vacuuming it to ensure a pristine environment for your aquatic pets.
Removing Debris and Waste
Before you begin cleaning the sand, it’s crucial to remove any visible debris and waste. This can include uneaten food, decaying plant matter, and fish waste that may have settled on the surface. To effectively remove these unwanted materials, follow these steps:
- Gently stir the sand: Use a clean sponge or brush to lightly stir the sand in circular motions. This will help bring the debris and waste to the surface, making it easier to remove.
- Siphon off the debris: Using a gravel vacuum or siphon, carefully hover it over the surface of the sand where the debris is located. The vacuum will create a gentle suction, allowing you to remove the waste without disturbing the sand too much.
- Work in sections: To ensure a thorough cleaning, divide your tank into sections and focus on one area at a time. This will prevent debris from spreading and allow you to give each section the attention it needs.
By removing debris and waste regularly, you can prevent the buildup of harmful substances and maintain a clean and healthy environment for your fish.
Stirring the Sand
Stirring the sand in your fish tank is an essential step in the cleaning process. This helps to dislodge any trapped debris and prevents the sand from compacting over time. Follow these tips to properly stir the sand:
- Use a gentle touch: When stirring the sand, it’s important to be gentle to avoid disturbing the fish or damaging any delicate plants. Use a soft sponge or brush and make small circular motions to gradually move the sand around.
- Focus on problem areas: Pay close attention to areas where debris may accumulate, such as corners or under decorations. By concentrating on these spots, you can ensure a thorough cleaning and prevent any hidden waste from causing issues in the future.
- Avoid excessive stirring: While it’s important to stir the sand, be mindful not to overdo it. Excessive stirring can lead to cloudiness in the water, as well as disturb the beneficial bacteria that help maintain a balanced ecosystem. Aim for a gentle and controlled approach.
By stirring the sand regularly, you can prevent debris from settling and maintain a visually appealing substrate for your fish tank.
Vacuuming the Sand
After removing debris and stirring the sand, the next step is to vacuum it. Vacuuming the sand helps to remove any remaining waste particles and ensures a thorough cleaning. Follow these steps to effectively vacuum the sand:

- Choose the right gravel vacuum: There are various types of gravel vacuums available, ranging from manual siphons to electric models. Select one that suits the size of your tank and your personal preference.
- Position the vacuum: Position the vacuum over the sand, ensuring that it hovers slightly above the surface. This will prevent the sand from being sucked into the vacuum and damaging the equipment or disturbing the fish.
- Start the siphon: If you’re using a manual siphon, initiate the flow of water by either sucking on the end of the tube or using a pump to start the siphon action. This will create a gentle suction that pulls up the waste without disturbing the sand.
- Move the vacuum: Slowly move the vacuum across the surface of the sand, allowing it to pick up any waste particles. Work in sections and cover the entire tank, paying extra attention to areas where debris tends to accumulate.
- Dispose of the waste water: As you vacuum the sand, the waste water will collect in a bucket or container. Dispose of this water properly, ensuring it does not contaminate any other water sources.
Regular vacuuming of the sand will help maintain a clean and healthy environment for your fish, preventing the buildup of harmful substances and ensuring the overall well-being of your aquatic pets.
Reassembling the Fish Tank after Sand Cleaning
After successfully cleaning the sand in your fish tank, it’s time to reassemble everything and create a clean and healthy environment for your fish and plants to thrive. This process involves refilling the tank with fresh water, reconnecting filters and heaters, and reintroducing your beloved aquatic inhabitants. Let’s dive in!
Refilling with Fresh Water
The first step in reassembling your fish tank after sand cleaning is refilling it with fresh water. It is crucial to ensure that the water you use is treated and free from any harmful chemicals or impurities. Here are the steps to follow:
- Prepare the water: Fill a clean bucket or container with tap water and let it sit for at least 24 hours. This will allow any chlorine or chloramine present in the water to dissipate naturally. Alternatively, you can use a water conditioner to remove these harmful chemicals instantly.
- Check the temperature: Before adding the water to the tank, make sure it is at the same temperature as the existing tank water. Sudden temperature changes can be stressful for your fish. Use a digital thermometer to measure the temperature and adjust it accordingly.
- Slowly add the water: Using a clean bucket or a siphon hose, slowly pour the treated water into the tank. Be careful not to disturb the sand bed or create strong currents that may unsettle your fish or plants. Aim the water flow towards a rock or decoration to minimize any disturbance.
- Monitor the water level: Keep an eye on the water level as you refill the tank. It is important to maintain the appropriate water level for the well-being of your aquatic pets. Refer to your tank’s manual or consult with a fishkeeping expert to determine the ideal water level for your specific setup.
Reconnecting Filters and Heaters
Now that your tank is filled with fresh water, it’s time to reconnect the essential components that contribute to a healthy aquatic ecosystem. This includes filters and heaters. Follow these steps to ensure proper reconnection:
- Clean the equipment: Before reconnecting the filters and heaters, take a moment to clean them. Remove any debris or buildup that may have accumulated during the sand cleaning process. This will help maintain their efficiency and prolong their lifespan.
- Reattach the filters: Carefully reattach the filters to their designated outlets or intake pipes. Ensure that all connections are secure and watertight. Refer to the manufacturer’s instructions for proper installation if needed.
- Reinstall the heaters: If you removed the heaters during the cleaning process, it’s time to put them back in place. Make sure the heaters are fully submerged in the water and positioned away from any decorations or plants to prevent accidental damage or overheating.
- Test the equipment: Before turning on the filters and heaters, double-check all connections and settings. Plug them in and observe for any unusual noises or malfunctions. If everything appears to be in order, proceed to the next step.
Reintroducing Fish and Plants
With the filters and heaters reconnected, it’s time to reintroduce your fish and plants back into their clean and refreshed habitat. Follow these steps to ensure a smooth transition:

- Acclimate your fish: The process of reintroducing fish to the tank after cleaning can be stressful for them. To minimize shock and stress, it’s important to acclimate them slowly. Float the fish bags or containers in the tank for about 15-20 minutes to allow the temperature to equalize. Then, gradually add small amounts of the tank water into the bags or containers over the next 30 minutes. Finally, gently release the fish into the tank.
- Replant your aquatic plants: If you have removed any live plants during the cleaning process, now is the time to replant them. Ensure that the plants are properly rooted in the substrate and positioned according to your desired aquascape. Trim any dead or decaying leaves before placing them back in the tank.
- Observe and monitor: Once all the fish and plants are reintroduced, take some time to observe their behavior. Look for signs of stress, agitation, or any abnormal behavior. It’s normal for fish to take some time to adjust to their environment again, but if you notice any concerning symptoms, consult with a veterinarian or experienced fishkeeper for guidance.
By following these steps, you can successfully reassemble your fish tank after cleaning the sand, creating a clean and healthy home for your aquatic pets. Remember to be patient and allow them time to readjust to their refreshed environment. Happy fishkeeping!
Maintenance Tips for Clean Sand in a Fish Tank
Maintaining clean sand in your fish tank is essential for the health and well-being of your aquatic pets. Regular maintenance ensures that the sand remains free from debris and waste, providing a clean and safe environment for your fish and plants to thrive. In this section, we will discuss some important maintenance tips to keep your fish tank sand in optimal condition.
Regular Water Changes
Regular water changes are crucial to maintain the cleanliness of the sand in your fish tank. It helps remove any accumulated waste or toxins that may have settled on the sand’s surface. Additionally, water changes replenish essential minerals and nutrients, promoting a healthy aquatic ecosystem.
To perform a water change, follow these steps:
- Prepare a clean bucket or container specifically designated for aquarium use.
- Use a gravel vacuum or siphon to remove water from the tank. Be careful not to disturb the sand excessively while doing this.
- Replace the removed water with fresh, dechlorinated water of the same temperature. It is important to match the water parameters to prevent any stress on your fish.
Regular water changes should be performed every 1-2 weeks, depending on the size of your tank and the number of fish. This frequency helps maintain a stable and healthy environment for your aquatic pets.
Monitoring Water Parameters
Monitoring water parameters is essential for maintaining clean sand in your fish tank. Regular testing allows you to identify any potential issues and take corrective actions promptly. The following parameters should be monitored regularly:
- pH Level: The pH level measures the acidity or alkalinity of the water. Most freshwater fish prefer a pH range between 6.5 and 7.5. Monitoring and adjusting the pH level accordingly helps to create a suitable environment for your fish.
- Ammonia, Nitrite, and Nitrate Levels: These compounds are byproducts of fish waste and decaying matter. High levels of ammonia and nitrite can be toxic to fish, while excessive nitrate can promote algae growth. Regular testing and maintaining appropriate levels are crucial for the health of your fish and the cleanliness of the sand.
- Temperature: Fish are sensitive to temperature changes, and maintaining a stable temperature is vital for their well-being. Use a reliable aquarium thermometer to monitor the water temperature and adjust it if necessary.
Monitoring water parameters can be done using test kits specifically designed for aquariums. Regular testing, ideally once a week, will help you detect any imbalances and take appropriate actions to maintain a clean and healthy environment for your fish.
Preventing Overfeeding
Overfeeding is a common mistake many aquarium owners make, leading to excessive waste accumulation in the tank. It is important to feed your fish an appropriate amount of food to prevent overfeeding and maintain clean sand.
Here are some tips to prevent overfeeding:
- Feed in Small Portions: Instead of feeding a large amount of food all at once, divide the daily feeding into smaller portions throughout the day. This helps to prevent uneaten food from sinking into the sand and decomposing.
- Monitor Feeding Behavior: Observe your fish during feeding time. If you notice that they are not consuming all the food within a few minutes, reduce the amount you are feeding them.
- Use a Feeding Ring or Area: Placing the food in a designated feeding ring or area can help prevent the food from spreading and sinking into the sand. This makes it easier for your fish to consume the food and minimizes waste accumulation.
By preventing overfeeding, you can minimize waste production and maintain cleaner sand in your fish tank.
In summary, maintaining clean sand in your fish tank requires regular water changes, monitoring water parameters, and preventing overfeeding. These maintenance tips ensure a healthy and thriving aquatic environment for your fish and plants. By following these guidelines, you can enjoy the beauty of your fish tank while providing the best care for your aquatic pets.
Troubleshooting Common Issues with Sand Cleaning
Sand cleaning in a fish tank can sometimes lead to certain issues that may cause concern for fish owners. It’s important to address these problems promptly to ensure the well-being of your aquatic pets. In this section, we will discuss three common issues that can arise during the sand cleaning process and provide practical solutions to troubleshoot them.
Cloudy Water after Sand Cleaning
One common issue that fish owners may encounter after cleaning the sand in their tank is cloudy water. This cloudiness can be caused by several factors, including the disturbance of settled debris and the release of fine particles into the water column. While it may initially be alarming, there are steps you can take to resolve this issue.
To address cloudy water, start by performing a partial water change. This will help remove any suspended particles and improve water clarity. Additionally, you can add a water clarifier, which will help to bind the particles together, allowing the filter to capture them more effectively. Follow the instructions on the clarifier product for the recommended dosage.
Another effective method to clear up cloudy water is the use of a mechanical filter media, such as a fine filter pad or filter floss. These media can trap the tiny particles, helping to clarify the water. Be sure to clean or replace the media regularly to maintain its effectiveness.
It’s also important to check and clean your aquarium filter. A clogged or dirty filter can contribute to cloudy water. Follow the manufacturer’s instructions for cleaning and maintenance to ensure optimal performance.
Sand Getting Sucked into the Vacuum
Another issue that may arise during the sand cleaning process is the unintentional suction of sand into the vacuum. This can be a frustrating problem, as it not only defeats the purpose of cleaning but can also potentially harm your fish or damage the vacuum.
To prevent sand from getting sucked into the vacuum, it’s important to adjust the suction power to a lower setting. High suction can create a strong force that pulls the sand towards the vacuum nozzle. By reducing the suction power, you can minimize the risk of sand being sucked up.
Additionally, consider using a gravel guard or a pre-filter attachment for your vacuum. These accessories are designed to prevent larger debris, including sand, from entering and clogging the vacuum. They act as a barrier, allowing water to flow through while trapping the sand.
During the cleaning process, pay attention to your vacuuming technique. Avoid placing the nozzle directly on the sand bed. Instead, hover it slightly above the surface to prevent accidental ingestion of sand.
Fish or Plants Disturbed by Sand Cleaning
The process of cleaning sand in a fish tank can sometimes disturb the fish and plants residing in it. Fish may become stressed or agitated, while plants may be uprooted or damaged. It’s essential to minimize these disturbances to ensure the well-being of your aquarium inhabitants.
Before starting the cleaning process, consider temporarily relocating your fish and plants to a separate container. This will not only protect them from any potential harm but also allow you to clean the sand more efficiently.
If relocating the fish and plants is not feasible, take extra care while cleaning around them. Use gentle movements and avoid disturbing their immediate surroundings. It’s also a good idea to cover delicate plants with your hand or a plastic barrier to shield them from any accidental contact.
After completing the sand cleaning process, take the time to observe your fish and plants. Watch for any signs of stress or distress, such as erratic swimming behavior or wilting leaves. If you notice any issues, take appropriate action, such as providing hiding spots for fish or trimming damaged plant parts.
(*Note: The content provided here is for informational purposes only and should not be considered as professional advice. Always consult with a qualified aquarium specialist or veterinarian for specific guidance regarding your fish tank.)