Discover the essential steps to prepare water for your fish tank. From dechlorination to adjusting pH levels, removing heavy metals, and , learn how to create a healthy environment for your fish.
Types of Water for Fish Tanks
When it comes to setting up a fish tank, choosing the right type of water is crucial for the health and well-being of your fish. There are several options available, each with its own benefits and considerations. Let’s take a closer look at three common types of water for fish tanks: tap water, well water, and bottled water.
Tap Water
Tap water is the most convenient and readily available option for filling up your fish tank. It is important to note, however, that tap water may contain chlorine, chloramines, and other chemicals that can be harmful to fish. These substances are added to municipal water supplies to kill bacteria and make the water safe for human consumption.
To make tap water safe for fish, it is necessary to remove these chemicals through a process called dechlorination. There are a few ways to achieve this. One method is by using a dechlorinator, which neutralizes chlorine and chloramines instantly. Another option is to let tap water sit out for 24 hours, allowing the chlorine to dissipate naturally. Boiling tap water can also remove chlorine, but it is not a practical solution for larger fish tanks.
Well Water
Well water is another option for filling up your fish tank. Unlike tap water, well water is not treated with chlorine or chloramines, as it comes from natural underground sources. However, well water may contain other minerals and impurities that can be harmful to fish. It is important to test the quality of your well water before using it in your fish tank.

If you have well water with high levels of minerals or impurities, it may be necessary to use a water conditioner or filtration system to remove these substances. Water conditioners are specifically designed to neutralize harmful elements and make the water safe for fish. Alternatively, activated carbon filters can be used to effectively remove impurities from well water.
Bottled Water
Bottled water is a convenient option for fish tanks, especially for smaller tanks or specific species that require specific water conditions. Bottled water is typically purified through processes such as reverse osmosis or distillation, which remove impurities and minerals. This ensures that the water is free from harmful substances that could negatively impact the health of your fish.
When using bottled water for your fish tank, it is important to choose a brand that does not add any additional minerals or chemicals. Always check the label to ensure that the water is suitable for fish tanks. It is also worth noting that using bottled water may be more expensive than other options, especially for larger tanks.
Conclusion
Choosing the right type of water for your fish tank is essential for creating a healthy and thriving aquatic environment. Tap water, well water, and bottled water each have their own advantages and considerations. Regardless of the type of water you choose, it is important to take steps to ensure the water is safe for your fish. Dechlorinators, water conditioners, and filtration systems can help remove harmful substances and create a suitable habitat for your fish. Remember to test the water regularly and make any necessary adjustments to maintain optimal water quality for your fish.
Dechlorinating Water for Fish Tanks
When it comes to setting up a fish tank, one of the most important steps is ensuring that the water is safe for your aquatic friends. Tap water, which is commonly used to fill fish tanks, often contains chlorine, a chemical that can be harmful to fish. Fortunately, there are several methods for dechlorinating water to make it safe for your fish.

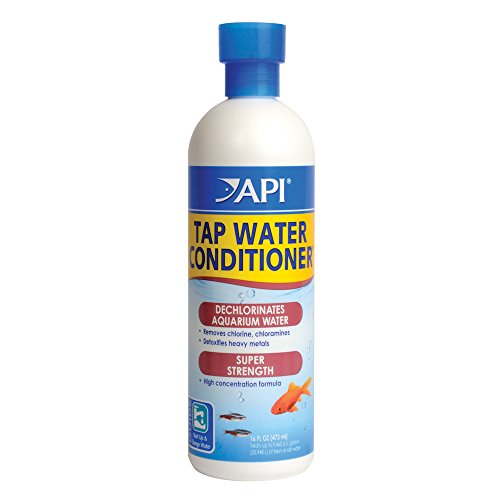
Using a Dechlorinator
One of the easiest and most effective ways to remove chlorine from tap water is by using a dechlorinator. These products are readily available at pet stores and online, and they work by neutralizing chlorine and chloramine, another common disinfectant used in tap water.
Using a dechlorinator is simple. Just follow the instructions on the product label and add the recommended amount to your fish tank. The dechlorinator will quickly detoxify the water, making it safe for your fish to live in. It’s important to note that different dechlorinators have different concentrations, so be sure to read the instructions carefully and use the appropriate amount for your tank size.
Letting Water Sit Out
Another method for dechlorinating tap water is to let it sit out for a period of time. When tap water is exposed to the air, the chlorine in it naturally dissipates over time.
To dechlorinate water using this method, simply fill a clean container with tap water and let it sit uncovered for at least 24 hours. During this time, the chlorine will gradually evaporate, making the water safe for your fish. However, it’s important to note that this method may not remove chloramine, so it’s best to use a dechlorinator if your tap water contains this disinfectant.
Boiling Water
Boiling water is another effective way to remove chlorine from tap water. When you boil water, the heat causes the chlorine to evaporate, leaving behind dechlorinated water.
To dechlorinate water through boiling, fill a pot with tap water and bring it to a rolling boil. Let it boil for at least 15 minutes to ensure that all the chlorine has evaporated. After boiling, allow the water to cool down to room temperature before adding it to your fish tank.
While boiling water is a reliable method for dechlorination, it can be time-consuming and may not be practical if you need to dechlorinate large volumes of water. In such cases, using a dechlorinator or letting the water sit out may be more convenient options.
Adjusting pH Levels in Fish Tank Water
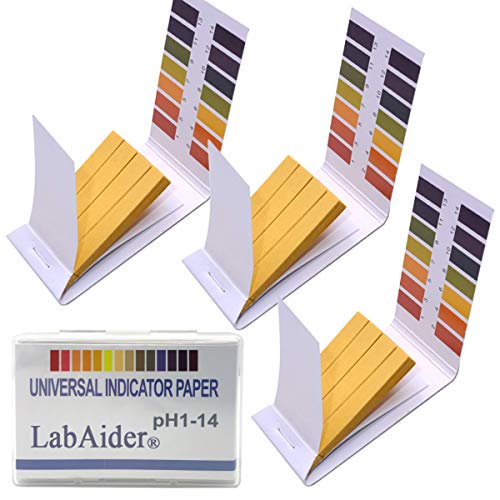
Using pH Testing Kits
Testing the pH levels of your fish tank water is an essential step in maintaining a healthy environment for your fish. pH testing kits are readily available and easy to use. They typically come with a color chart that allows you to compare the color of the water in your tank to determine its pH level.
To test the pH of your fish tank water, simply fill a test tube with water from your tank and add a few drops of the pH testing solution. Shake the test tube gently to mix the solution with the water, and then compare the color of the water to the color chart. The chart will indicate the pH level of your water, which can range from acidic (below 7) to neutral (7) to alkaline (above 7).
Once you have determined the pH level of your fish tank water, you can make adjustments as needed to create the optimal conditions for your fish.
Adding pH Adjusting Solutions
If the pH of your fish tank water is not within the desired range for your fish species, you can use pH adjusting solutions to bring it to the appropriate level. These solutions are available in liquid or powder form and can be easily added to your tank.
To add a pH adjusting solution to your fish tank, follow the instructions provided on the product packaging. Typically, you will need to measure the appropriate amount of solution based on the volume of your tank and gradually add it to the water. It’s important to follow the instructions carefully to avoid sudden and drastic changes in pH, as this can stress or harm your fish.
When adding pH adjusting solutions, it’s important to monitor the pH levels regularly to ensure they remain stable. Fish can be sensitive to sudden changes in pH, so it’s best to make gradual adjustments over time. Regular testing with pH testing kits will help you keep track of the pH levels and make any necessary adjustments.
Incorporating these pH adjusting solutions into your routine maintenance will help create a stable and comfortable environment for your fish, promoting their overall health and well-being.
Conclusion
Maintaining the appropriate pH levels in your fish tank water is crucial for the health and happiness of your fish. Using pH testing kits and adding pH adjusting solutions are effective methods to achieve and maintain the desired pH levels. By regularly monitoring and adjusting the pH, you can create a stable and comfortable environment for your fish, reducing stress and promoting their overall well-being. Remember to follow the instructions provided with the testing kits and adjusting solutions, and make gradual changes to avoid sudden disruptions in the pH levels. With proper pH regulation, your fish will thrive in their aquatic home.
Removing Heavy Metals from Fish Tank Water
When it comes to maintaining a healthy and thriving fish tank, one of the most important aspects to consider is the quality of the water. Heavy metals can be detrimental to the health of your fish and other aquatic life, so it’s crucial to take steps to remove them from the water. In this section, we will discuss two effective methods: using water conditioners and utilizing activated carbon filters.
Using Water Conditioners
Water conditioners are a popular and convenient way to remove heavy metals from fish tank water. These products work by neutralizing the harmful effects of metals such as copper, lead, and zinc, making the water safe for your fish. Water conditioners typically contain compounds like sodium thiosulfate, which bind with the metals and render them harmless.
Using a water conditioner is simple. Just follow the instructions on the product label and add the appropriate amount to your fish tank. It’s important to note that water conditioners are not a permanent solution and will need to be added regularly, especially during water changes. Regular use of water conditioners will ensure that heavy metals are consistently removed from the water and your fish are protected.
Activated Carbon Filters
Activated carbon filters are another effective method for removing heavy metals from fish tank water. These filters contain activated carbon, which has a high surface area and can trap impurities, including heavy metals, as water passes through. The activated carbon acts like a sponge, absorbing the metals and preventing them from re-entering the water.
Using an activated carbon filter is relatively straightforward. You can either purchase a filter that is specifically designed for fish tanks or use a general-purpose activated carbon filter and adapt it to fit your tank. Install the filter according to the manufacturer’s instructions and ensure that water passes through it before entering the tank. Regularly replace the activated carbon to maintain its effectiveness.
One advantage of using activated carbon filters is that they can also remove other impurities, such as chlorine and organic compounds, from the water. This helps to create a cleaner and healthier environment for your fish. However, it’s worth noting that activated carbon filters may not be suitable for all types of fish tanks, especially those with delicate or sensitive species. In such cases, it’s best to consult with a knowledgeable aquarium specialist.
Temperature Regulation for Fish Tank Water
Maintaining the right temperature in your fish tank is crucial for the health and well-being of your aquatic pets. Fish are ectothermic creatures, which means their body temperature is regulated by the temperature of their environment. Fluctuations in water temperature can stress fish and even lead to illness or death. In this section, we will explore two methods of temperature regulation: using a heater and cooling the water.
Using a Heater
One of the most common ways to regulate water temperature in a fish tank is by using a heater. A heater is especially essential if you have tropical fish that require a specific temperature range to thrive. These heaters are typically submersible and can be adjusted to maintain a consistent temperature.
When selecting a heater for your fish tank, consider the size of your tank and the temperature requirements of your fish. It is crucial to choose a heater that is suitable for the volume of water in your tank. Using an undersized heater may not effectively heat the water, while an oversized heater can cause sudden temperature spikes that can be harmful to your fish.
To use a heater, follow these steps:
- Research the temperature needs of your fish: Different species of fish have different temperature requirements. Make sure you are aware of the ideal temperature range for your specific fish.
- Choose the right heater: Select a heater that is appropriate for your tank size and can maintain the desired temperature range. Consider investing in a reliable and adjustable heater to ensure accurate temperature control.
- Install the heater: Submerge the heater in your fish tank according to the manufacturer’s instructions. It is essential to place the heater near a water flow source, such as a filter or pump, to distribute the heated water evenly throughout the tank.
- Monitor the temperature: Use a thermometer to regularly check the water temperature. Adjust the heater as needed to maintain the desired temperature range.
Remember, sudden temperature changes can be stressful for fish. It is essential to gradually adjust the temperature if necessary, rather than making sudden and drastic changes. By using a heater, you can provide a stable and comfortable environment for your fish.
Cooling the Water
While heaters are commonly used to regulate temperature, there may be instances where you need to cool down the water in your fish tank. This is especially true during hot summer months or if you live in a warm climate. Cooling the water can help prevent overheating and ensure the well-being of your fish.
Here are some methods to cool down the water in your fish tank:
- Reduce ambient temperature: Place your fish tank away from direct sunlight or any heat sources such as radiators or appliances that generate heat. This will prevent the water temperature from increasing due to external factors.
- Increase aeration: Enhanced aeration can help lower the water temperature in your tank. You can achieve this by adding an air stone or increasing the flow rate of your filter. The increased surface agitation will enhance evaporation, leading to cooling.
- Use a fan: Positioning a fan near the surface of the water can facilitate evaporative cooling. The moving air increases evaporation, effectively reducing the water temperature. However, be cautious not to create excessive water movement that may stress your fish.
- Add ice packs or frozen water bottles: Placing ice packs or frozen water bottles wrapped in a cloth into the tank can provide temporary relief from high temperatures. This method should be used with caution, as it can cause rapid temperature fluctuations if not monitored closely.
- Consider a chiller: If you live in a consistently warm climate or have a large aquarium, investing in a chiller may be necessary. A chiller is a device specifically designed to cool down the water in a fish tank. It works similarly to a heater but in reverse, removing heat from the water to maintain a desired temperature range.
Remember to monitor the water temperature regularly, especially during warmer periods. Sudden fluctuations in temperature, whether hot or cold, can be stressful for your fish. By utilizing these cooling methods, you can create a comfortable environment for your aquatic pets even during the hottest days.
Adding Beneficial Bacteria to Fish Tank Water
When it comes to maintaining a healthy and thriving fish tank, adding beneficial bacteria to the water is crucial. These tiny organisms play a vital role in the aquarium ecosystem by breaking down waste, reducing harmful toxins, and promoting a balanced environment for your fish. In this section, we will explore two methods of introducing beneficial bacteria into your fish tank: cycling the tank and using biological boosters.
Cycling the Tank
Cycling the tank is a natural and effective way to establish beneficial bacteria in your fish tank. This process involves creating an environment where these bacteria can grow and multiply before adding any fish. Here’s how it works:
- Prepare the Tank: Start by setting up your fish tank with all the necessary equipment, such as a filter and heater. Fill the tank with dechlorinated water, ensuring the temperature is suitable for the type of fish you plan to keep.
- Introduce an Ammonia Source: To kick-start the growth of beneficial bacteria, you’ll need to add an ammonia source to the tank. This can be done by either adding a small amount of fish food or using pure ammonia. The bacteria will feed on the ammonia, converting it into less harmful substances.
- Monitor Water Parameters: Throughout the cycling process, it’s essential to monitor the water parameters regularly. Use a water testing kit to measure the levels of ammonia, nitrite, and nitrate. Initially, you will observe a spike in ammonia levels, followed by an increase in nitrite. Finally, nitrate levels will rise, indicating that the cycling process is nearing completion.
- Patience is Key: The cycling process can take several weeks to complete. It’s crucial to be patient and allow the beneficial bacteria to establish themselves fully. Avoid adding any fish until the water parameters stabilize, showing zero ammonia and nitrite readings.
Cycling the tank is a natural method that mimics the establishment of beneficial bacteria in nature. It ensures a stable and healthy environment for your fish, reducing the risk of ammonia and nitrite poisoning.
Using Biological Boosters
If you’re looking for a quicker way to introduce beneficial bacteria to your fish tank, using biological boosters can be a viable option. These products contain live bacteria cultures that can jumpstart the cycling process and establish a healthy bacterial colony. Here’s how to use them effectively:
- Choose a Reliable Product: Look for a reputable brand of biological booster specifically formulated for aquarium use. These products often come in liquid or powder form and contain a variety of beneficial bacteria strains.
- Follow the Instructions: Each biological booster product will have its own set of instructions. It’s essential to read and follow them carefully to ensure the best results. The instructions will typically guide you on the dosage and when to add the product to your fish tank.
- Monitor Water Parameters: Even when using biological boosters, it’s crucial to regularly monitor the water parameters to ensure the cycling process is proceeding as expected. Testing the ammonia, nitrite, and nitrate levels will give you an idea of the progress and when it’s safe to add fish.
Biological boosters can significantly speed up the cycling process, allowing you to introduce fish to your tank sooner. However, it’s still essential to exercise caution and monitor the water parameters to ensure a safe and stable environment for your aquatic pets.
Water Changing Techniques for Fish Tanks
Are you a proud fish tank owner looking for the best ways to maintain the water quality in your tank? One important aspect of fish tank maintenance is water changes. In this section, we will explore two water changing techniques that can help keep your fish happy and healthy: partial water changes and complete water changes.
Partial Water Changes
Partial water changes involve replacing a portion of the water in your fish tank while leaving the fish and decorations in place. This technique is less disruptive to the aquarium ecosystem and is often recommended for established tanks. Here’s how you can perform a partial water change:
- Gather the necessary equipment: Before starting the water change, make sure you have a siphon or a gravel vacuum, a clean bucket, and a water conditioner on hand.
- Prepare the new water: Fill the bucket with tap water and treat it with a water conditioner to remove chlorine and other harmful chemicals. Make sure the water is at the same temperature as the tank to avoid shocking the fish.
- Remove the old water: Use the siphon or gravel vacuum to gently remove a portion of the water from the tank. Aim to remove about 10-20% of the total volume. Be careful not to disturb the substrate or uproot any plants.
- Add the new water: Slowly pour the treated water back into the tank, taking care not to pour it directly onto the fish or decorations. Allow the water to settle before turning on any filters or heaters.
- Monitor the water parameters: After the water change, monitor the water parameters such as temperature, pH, and ammonia levels to ensure they remain within the appropriate range. Regular testing is essential for maintaining a healthy fish tank.
Partial water changes are beneficial as they help dilute toxins, remove excess nutrients, and replenish essential minerals in the tank. By regularly performing partial water changes, you can create a stable and healthy environment for your fish.
Complete Water Changes
Complete water changes involve removing all the water from the fish tank and replacing it with fresh water. This technique is more invasive and is typically done when dealing with severe water quality issues or during tank setup. Here’s how you can perform a complete water change:
- Prepare the new water: Fill a clean bucket with tap water and treat it with a water conditioner. Make sure the water is at the same temperature as the tank to prevent shocking the fish.
- Remove the fish and decorations: Carefully remove the fish and any decorations from the tank and place them in a separate container filled with tank water. This will help keep them safe during the water change.
- Drain the old water: Using a siphon or a bucket, remove all the water from the tank. Take this opportunity to clean the tank walls and remove any debris or algae.
- Clean the filter: If you have a filter, clean it according to the manufacturer’s instructions during the water change. This will help maintain its efficiency and ensure proper filtration.
- Add the new water: Slowly pour the treated water back into the tank, taking care not to disturb the fish or decorations. Allow the water to settle before reintroducing the fish.
- Reintroduce the fish: Gently transfer the fish back into the tank, ensuring they are acclimated to the new water temperature. Monitor their behavior and health in the following days to ensure a smooth transition.
Complete water changes are more labor-intensive and should be done sparingly, as they can disrupt the tank’s ecosystem. It is important to note that complete water changes may also remove beneficial bacteria that help maintain a balanced aquarium. Therefore, it is crucial to monitor water parameters and consider using biological boosters to replenish the beneficial bacteria after a complete water change.
Maintaining Water Quality in Fish Tanks
Regular Testing
Regular testing of the water in your fish tank is crucial for maintaining the health and well-being of your fish. It allows you to monitor important parameters such as pH levels, ammonia, nitrite, and nitrate levels. By regularly testing these parameters, you can identify any issues early on and take the necessary steps to correct them.
- Testing pH Levels: Using a pH testing kit, you can measure the acidity or alkalinity of the water in your fish tank. Different fish species have different pH requirements, so it’s important to ensure that the pH levels are within the appropriate range for your specific fish.
- Testing Ammonia Levels: Ammonia is a toxic substance that is produced from fish waste and decaying organic matter in the tank. High levels of ammonia can be harmful to fish, causing stress and even death. By regularly testing ammonia levels, you can ensure that they are kept at a safe level and take steps to reduce ammonia if necessary.
- Testing Nitrite and Nitrate Levels: Nitrite is produced when beneficial bacteria break down ammonia in the tank. While nitrite is less toxic than ammonia, high levels can still be harmful to fish. Nitrate is the end product of the nitrogen cycle and is less toxic than both ammonia and nitrite. However, high nitrate levels can still have negative effects on fish health. Regular testing of nitrite and nitrate levels allows you to keep them in check and prevent any potential issues.
Filtration Systems
An effective filtration system is essential for in your fish tank. It helps remove physical debris, excess waste, and harmful substances from the water, ensuring a clean and healthy environment for your fish. There are different types of filtration systems available, each serving a specific purpose.
- Mechanical Filtration: This type of filtration removes physical debris such as uneaten food, fish waste, and plant matter from the water. It typically involves the use of a filter media, such as filter floss or sponge, which traps and removes these particles.
- Biological Filtration: Biological filtration is carried out by beneficial bacteria that colonize the filter media. These bacteria help break down harmful substances like ammonia and nitrite into less toxic forms, such as nitrate. A well-established biological filtration system is crucial for maintaining a stable and healthy nitrogen cycle in your fish tank.
- Chemical Filtration: Chemical filtration involves the use of activated carbon or other chemical media to remove impurities and toxins from the water. Activated carbon can absorb organic compounds, medications, and some heavy metals, improving water quality and clarity.
- UV Sterilizers: UV sterilizers use ultraviolet light to kill or inhibit the growth of algae, bacteria, and parasites in the water. They are particularly effective in preventing the spread of diseases and keeping the water crystal clear.
It’s important to choose a filtration system that is appropriate for the size of your tank and the needs of your fish. Regular maintenance, such as cleaning and replacing filter media, is also essential to ensure the effectiveness of the filtration system.
Preparing Saltwater for Marine Tanks
Mixing Saltwater
Preparing saltwater for marine tanks is an essential step in creating a suitable environment for your marine fish and invertebrates. When mixing saltwater, it is crucial to maintain the right balance of salt and other elements to mimic the natural conditions of the ocean. Here are some steps to follow when mixing saltwater:
- Begin by gathering all the necessary equipment and materials, including a clean container, a hydrometer or refractometer to measure salinity levels, and marine salt mix specifically designed for aquarium use.
- Fill the container with the appropriate amount of freshwater. It is best to use reverse osmosis (RO) water or distilled water to ensure that no unwanted impurities or contaminants are introduced into the tank.
- Gradually add the marine salt mix to the water, following the manufacturer’s instructions for the correct ratio. Stir the mixture gently to dissolve the salt completely. It is important to note that different marine species may require different salinity levels, so it is crucial to research the specific needs of your fish and invertebrates beforehand.
- After the salt is fully dissolved, use a hydrometer or refractometer to measure the salinity levels. The ideal salinity range for a marine tank is usually between 1.020 and 1.025 specific gravity or 33 to 35 parts per thousand (ppt). Adjust the saltwater accordingly, adding more salt mix or freshwater as needed, until you achieve the desired salinity level.
- Once the saltwater is mixed and the salinity levels are correct, let the water sit for a few hours to allow any residual chemicals or impurities to dissipate. It is also a good idea to aerate the water during this time to ensure sufficient oxygenation.
- Finally, test the pH level of the saltwater using a pH testing kit. The pH level should ideally be between 8.1 and 8.4, which is slightly alkaline. If the pH level is outside the recommended range, you can make adjustments using pH adjusting solutions specifically formulated for aquarium use.
Testing Salinity Levels
Regularly testing the salinity levels in your marine tank is crucial for maintaining a stable and healthy environment for your fish and invertebrates. Fluctuations in salinity can stress the inhabitants and even lead to serious health issues. Here are some tips for testing salinity levels:
- Use a reliable hydrometer or refractometer to measure the specific gravity or salinity of the water. These tools provide accurate readings and are specifically designed for aquarium use.
- Before testing, make sure to thoroughly clean the testing equipment to avoid any potential contamination that could affect the accuracy of the results.
- Take a small sample of water from your tank, making sure to avoid any debris or algae. Some hydrometers and refractometers come with a built-in sample well, while others require you to place the water on a clean and dry surface.
- Follow the instructions provided by the manufacturer to obtain an accurate reading. For hydrometers, you need to ensure that the water level is at eye level when reading the specific gravity. Refractometers, on the other hand, use a prism to refract light, providing a clear salinity reading.
- Record the salinity level in a logbook or a digital aquarium maintenance app, along with the date and time of the test. This will help you track any changes over time and identify any patterns or trends.
- If the salinity level is outside the recommended range, you may need to make adjustments to the saltwater. Gradually add more salt mix or freshwater, depending on whether the salinity is too high or too low, until you achieve the desired level.
Regularly monitoring and maintaining the salinity levels in your marine tank is essential for the overall health and well-being of your fish and invertebrates. By following these steps and conducting regular tests, you can ensure that your marine tank provides a stable and suitable habitat for your aquatic pets.