Looking to replace your Top Fin light? Explore the reasons, types, steps, and the perfect replacement. Keep your aquarium well-lit and vibrant with our comprehensive guide.
Reasons to Replace Top Fin Light
1. Dimming or Flickering Light
Is your top fin light dimming or flickering? This could be a sign that it’s time for a replacement. Dimming or flickering lights can be frustrating and can disrupt the overall aesthetic of your aquarium. Not only does it make it difficult to see your fish and plants clearly, but it can also be detrimental to their health. Fish and plants rely on consistent lighting for their growth and well-being. If your top fin light is dimming or flickering, it may be a sign of a faulty bulb or a more significant electrical issue.
2. Broken or Cracked Light Fixture
A broken or cracked light fixture is another reason to consider replacing your top fin light. A damaged fixture not only detracts from the visual appeal of your aquarium but also poses a potential safety hazard. Cracks or breaks in the fixture can expose the electrical components, increasing the risk of electrical shock or fire. Additionally, a damaged fixture may not provide adequate support for the light bulb or tube, affecting its stability and functionality. If you notice any damage to your top fin light fixture, it’s best to replace it promptly to ensure the safety of your aquarium and its inhabitants.
3. Outdated or Inefficient Lighting Technology
Outdated or inefficient lighting technology is a common reason for top fin light replacement. As technology advances, newer lighting options become available that offer improved energy efficiency and better lighting quality. Outdated lighting technology, such as incandescent bulbs, consume more energy and generate more heat compared to modern alternatives. This not only increases your energy costs but also puts added strain on your aquarium’s temperature regulation. By upgrading to more efficient options like LED light bulbs or fluorescent light tubes, you can reduce energy consumption, lower heat output, and provide better lighting conditions for your aquatic environment.
Types of Top Fin Light Replacements
When it comes to replacing the top fin light in your aquarium, there are several options available to choose from. Each type of replacement offers its own advantages and considerations. In this guide, we will explore the three main types of top fin light replacements: LED light bulbs, fluorescent light tubes, and halogen light bulbs.

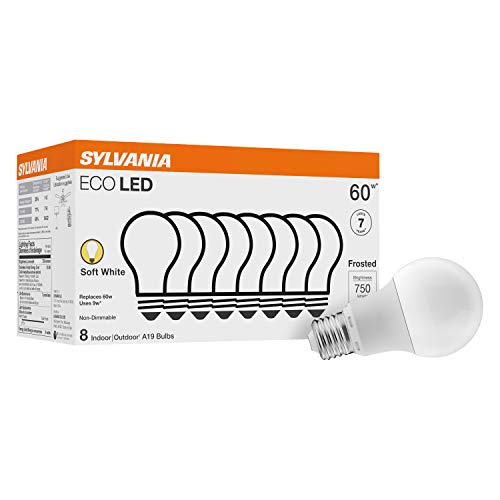
1. LED Light Bulbs
LED (Light Emitting Diode) light bulbs have gained popularity in recent years due to their energy efficiency and long lifespan. These bulbs are known for producing bright and vibrant light, making them an excellent choice for illuminating your aquarium.
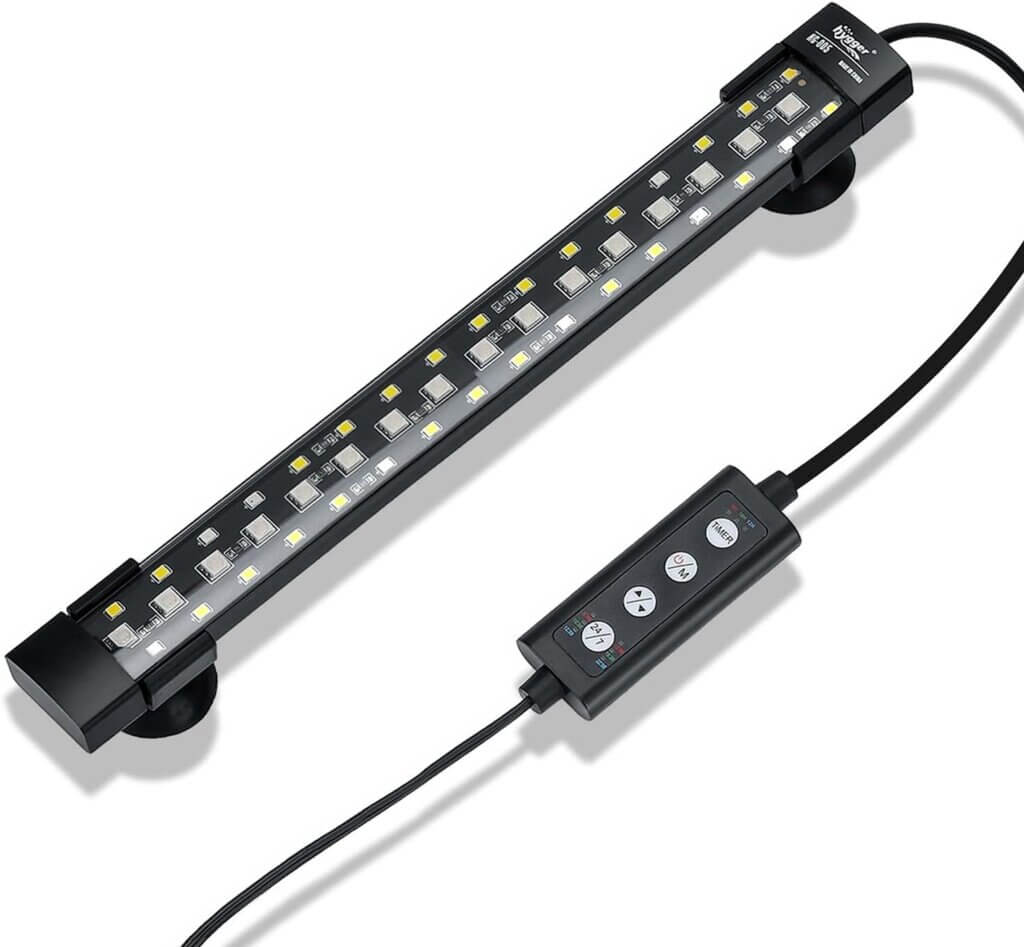
One of the main advantages of LED light bulbs is their energy efficiency. They consume significantly less electricity compared to traditional incandescent or fluorescent bulbs, which can help reduce your energy costs. Additionally, LED bulbs have a longer lifespan, lasting up to 50,000 hours or more, which means you won’t have to replace them as frequently.
LED light bulbs also emit little heat, making them safer for your aquarium inhabitants. The low heat output reduces the risk of overheating your tank and helps maintain a stable temperature. Furthermore, LED bulbs are available in a wide range of colors, allowing you to create different lighting effects and enhance the visual appeal of your aquarium.
When choosing LED light bulbs as top fin replacements, it is important to consider the specific lighting needs of your aquatic plants and animals. Different species have varying light requirements, so it’s crucial to select LED bulbs that provide the appropriate light intensity and spectrum. Conducting research on the lighting needs of your aquarium inhabitants will help you make an informed decision.
2. Fluorescent Light Tubes
Fluorescent light tubes have long been a popular choice for aquarium lighting due to their affordability and availability in different sizes and wattages. These tubes are known for their bright and even light distribution, making them suitable for most aquarium setups.

One of the advantages of using fluorescent light tubes is their ability to support plant growth. These tubes emit a broad spectrum of light, including wavelengths that are beneficial for photosynthesis. This makes them ideal for aquariums with live plants, as they promote healthy growth and vibrant colors.
Fluorescent light tubes are also relatively easy to install and replace. They come in standard sizes and can be easily fitted into compatible fixtures. Additionally, these tubes are cost-effective, making them a budget-friendly option for aquarium enthusiasts.
However, it is important to note that fluorescent light tubes have a shorter lifespan compared to LED bulbs. On average, fluorescent tubes last for about 10,000 to 15,000 hours before needing replacement. Regularly monitoring the performance of these tubes and replacing them within the recommended lifespan is crucial to ensure optimal lighting conditions for your aquarium.
When choosing fluorescent light tubes, consider the color temperature and intensity required for your aquarium inhabitants. Different species have specific lighting preferences, so selecting tubes that meet their needs will contribute to their overall well-being.
3. Halogen Light Bulbs
Halogen light bulbs have been used in aquarium lighting for their ability to produce intense and focused lighting. These bulbs emit a warm, white light that enhances the colors of your aquatic plants and fish.

One of the main advantages of halogen light bulbs is their high light output. They provide bright illumination, making them suitable for aquariums with deep tanks or those with light-demanding plants. Halogen bulbs also have a long lifespan, typically lasting between 2,000 to 4,000 hours.
Halogen bulbs are available in various wattages and beam angles, allowing you to customize the lighting in your aquarium. They are often used in combination with other types of lighting to create a visually appealing and dynamic environment.
However, it is important to note that halogen bulbs generate a significant amount of heat. This can be a concern in aquariums, as excessive heat can raise the water temperature and potentially harm your aquatic life. Proper ventilation and monitoring of the temperature are necessary when using halogen bulbs to ensure the well-being of your aquarium inhabitants.
When choosing halogen light bulbs, consider the specific lighting requirements of your aquarium inhabitants. Some species may prefer lower light intensity, while others thrive in intense lighting conditions. Understanding the needs of your aquatic life will help you determine if halogen bulbs are the right choice for your aquarium.
Steps to Replace Top Fin Light
Replacing the top fin light in your aquarium can be a straightforward process if you follow the right steps. In this section, we will guide you through each step to ensure a successful replacement. Remember, safety should always be your top priority when working with electrical components, so make sure to turn off the power supply before beginning any work.
Turn Off Power Supply
Before you start replacing the top fin light, it is crucial to turn off the power supply to avoid any potential electrical hazards. Locate the switch or circuit breaker that controls the power to your aquarium lights and switch it off. This will ensure that you can work safely without the risk of electric shock.
Remove Old Light Bulb or Tube
Once you have turned off the power supply, it’s time to remove the old light bulb or tube from your top fin light fixture. Carefully unscrew the bulb or remove the tube following the manufacturer’s instructions. Be gentle to avoid damaging the fixture or causing any injuries.
Install New Light Bulb or Tube
With the old light bulb or tube removed, you can now proceed to install the new one. Make sure to choose a replacement that is compatible with your top fin light fixture. LED light bulbs, fluorescent light tubes, and halogen light bulbs are common options for aquarium lighting. Consider factors such as energy efficiency, lifespan, and light intensity when making your choice.
To install the new light bulb, simply screw it into the socket or insert it into the fixture, following the manufacturer’s instructions. For fluorescent light tubes, align the pins on the tube with the slots in the fixture and push it firmly until it clicks into place. Double-check that the new bulb or tube is securely installed to prevent any issues later on.
Test the New Light
After installing the new light bulb or tube, it’s essential to test it to ensure it is functioning correctly. Turn on the power supply and observe if the new light illuminates the aquarium adequately. Check for any flickering or dimming, which could indicate an issue with the installation. If everything looks good, you have successfully replaced the top fin light!

It’s worth noting that sometimes, may be required if the new light doesn’t turn on or if the lighting appears uneven or patchy. We will cover these issues in a later section to provide you with the necessary guidance to address them effectively.
Remember, before starting the replacement process, always refer to the manufacturer’s instructions specific to your top fin light fixture. These instructions may provide additional details or precautions that are crucial for a successful replacement.
Replacing the top fin light in your aquarium doesn’t have to be a daunting task. By following these steps and taking the necessary precautions, you can provide your aquatic pets with adequate lighting to thrive in their underwater habitat.
Tips for Choosing Top Fin Light Replacements
When it comes to choosing the right replacement for your Top Fin light, there are a few important factors to consider. By taking into account the size of your tank, the light intensity you desire, the energy efficiency and lifespan of the light, as well as the compatibility with your existing setups, you can ensure that you make the best possible choice for your aquarium.
Consider Tank Size and Light Intensity
One of the first things to consider when choosing a replacement for your Top Fin light is the size of your tank. Different tanks have different lighting needs, and it is important to choose a light that is suitable for the size of your aquarium. A larger tank may require a more powerful light to adequately illuminate the entire space, while a smaller tank may need a less intense light to avoid overwhelming the aquatic life.
In addition to tank size, it is also crucial to consider the desired light intensity. Some aquatic plants and fish require higher light levels, while others thrive in lower light conditions. By understanding the specific lighting needs of your aquarium inhabitants, you can select a replacement light that provides the optimal intensity for their growth and well-being.
Evaluate Energy Efficiency and Lifespan
Another important factor to consider when choosing a replacement for your Top Fin light is the energy efficiency of the light. Energy-efficient lights not only help reduce your electricity bills but also have a positive impact on the environment. LED lights, for example, are known for their energy efficiency and can significantly lower your energy consumption compared to traditional lighting options.
In addition to energy efficiency, it is essential to evaluate the lifespan of the light. The longer the lifespan, the less frequently you will need to replace the light, saving you both time and money in the long run. LED lights often have a longer lifespan compared to other types of lights, making them a popular choice for aquarium owners.
Research Compatibility with Existing Setups
Lastly, it is crucial to research the compatibility of the replacement light with your existing setups. This includes considering the type of light fixture you have, the mounting options available, and any specific requirements for installation. Some lights may be designed for specific fixtures or may require additional accessories for proper installation. By ensuring compatibility, you can avoid any potential issues or complications during the replacement process.
To summarize, when choosing a replacement for your Top Fin light, consider the tank size and light intensity requirements of your aquarium inhabitants. Evaluate the energy efficiency and lifespan of the light to make an environmentally friendly and cost-effective choice. Additionally, research the compatibility of the replacement light with your existing setups to avoid any installation complications. By taking these tips into account, you can ensure that you select the best replacement for your Top Fin light and provide optimal lighting for your aquatic ecosystem.
Common Issues with Top Fin Light Replacement
When it comes to replacing the top fin light in your aquarium, there are a few common issues that you may encounter. These issues can affect the overall performance and functionality of your lighting system. In this section, we will discuss three common problems that aquarium owners often face when replacing their top fin light: incorrect light size or type, poor light distribution, and incompatible lighting controls.
Incorrect Light Size or Type
One of the most common issues that aquarium owners face when replacing their top fin light is selecting the incorrect light size or type. It is crucial to choose a light that is suitable for your tank size and the specific needs of your aquatic plants and animals. Using the wrong size or type of light can result in inadequate lighting conditions, which can negatively impact the growth and health of your aquarium’s inhabitants.
To avoid this issue, it is essential to carefully research and consider the lighting requirements of your tank. Determine the size of your aquarium and the specific light intensity needed for your plants and animals to thrive. You can consult with a knowledgeable aquarium specialist or refer to the manufacturer’s guidelines for your top fin light replacement.
Poor Light Distribution
Another issue that aquarium owners may face when replacing their top fin light is poor light distribution. Proper light distribution is crucial for ensuring that all areas of your aquarium receive adequate illumination. Uneven lighting can lead to shaded areas where plants cannot grow, or fish may not receive enough light for their well-being.
To address this issue, you may need to consider adjusting the placement or angle of your top fin light. Experiment with different positions to achieve the optimal light distribution throughout your aquarium. Additionally, you can consider using reflectors or light diffusers to help spread the light more evenly.
Incompatible Lighting Controls
The third common issue that can arise during the replacement of a top fin light is incompatible lighting controls. Some aquarium lighting systems come with built-in controls or require external control devices to adjust the intensity or timing of the lights. However, not all lighting controls are compatible with every type of top fin light.
Before purchasing a replacement top fin light, it is essential to ensure that the lighting controls you currently have or plan to use are compatible with the new light. Check the specifications of both the light and the control system to ensure they are compatible. If they are not, you may need to consider upgrading your lighting controls or selecting a different top fin light that is compatible with your existing setup.
Maintenance and Care for Top Fin Lights
Regular maintenance and care for your top fin lights are crucial to ensure their optimal performance and longevity. By following a few simple steps, you can prevent issues such as algae growth, loose fixtures, and premature light replacements.
Regular Cleaning to Prevent Algae Growth
- Algae growth is a common problem in aquariums, and it can quickly take over your top fin lights, affecting their efficiency and aesthetics. Regular cleaning is essential to prevent this issue.
- Start by turning off the power supply to the lights. This ensures your safety and prevents any electrical mishaps during the cleaning process.
- Gently remove the top fin lights from their fixtures, taking care not to damage any delicate components. Make sure to refer to the manufacturer’s instructions for specific cleaning methods.
- Using a soft, non-abrasive cloth or sponge, wipe away any accumulated dirt, dust, or algae from the light surface. Avoid using harsh chemicals or abrasive materials that can scratch or damage the lights.
- For more stubborn algae growth, you can prepare a mild cleaning solution by mixing water and vinegar in equal parts. Dip the cloth or sponge into the solution and gently scrub the affected areas.
- Rinse the lights thoroughly with clean water to remove any residue from the cleaning solution. Make sure to dry them completely before reinstalling them to prevent any electrical hazards.
- Regularly cleaning your top fin lights not only maintains their appearance but also ensures that they emit the right amount and quality of light for your aquarium inhabitants.
Inspecting and Tightening Light Fixtures
- Over time, the fixtures that hold your top fin lights in place may become loose due to vibrations or accidental bumps. Regular inspection and tightening of these fixtures are necessary to prevent any mishaps.
- Begin by turning off the power supply to the lights to eliminate the risk of electrical shock.
- Carefully examine the fixtures, checking for any signs of wear, rust, or damage. If you notice any issues, it may be necessary to replace the fixtures to ensure the safety and stability of your top fin lights.
- Using the appropriate tools, tighten any loose screws or bolts that secure the fixtures. Make sure not to overtighten them, as this can cause damage.
- Inspect the wiring connections to ensure they are secure and free from any fraying or damage. If you notice any issues, it is advisable to seek professional assistance to avoid any electrical hazards.
- By regularly inspecting and tightening the light fixtures, you can prevent accidents and ensure that your top fin lights stay firmly in place, providing adequate illumination for your aquarium.
Replacing Lights within Recommended Lifespan
- Like any other lighting technology, top fin lights have a lifespan, and it is essential to replace them within the recommended time frame to maintain optimal performance.
- Consult the manufacturer’s guidelines or product specifications to determine the expected lifespan of your top fin lights. This information will vary depending on the type of lights you have, such as LED light bulbs, fluorescent light tubes, or halogen light bulbs.
- Keep track of the installation date or use a calendar reminder to ensure you replace the lights when necessary. Outdated or worn-out lights can emit less light, have reduced energy efficiency, and may even pose a fire hazard.
- When replacing the lights, refer to the manufacturer’s instructions to ensure a proper installation. Improper installation can lead to electrical issues or damage to the lights.
- Consider upgrading to newer, more energy-efficient lighting technology when replacing your top fin lights. LED light bulbs, for example, offer longer lifespans and consume less energy, resulting in cost savings over time.
- By adhering to the recommended lifespan and replacing your top fin lights in a timely manner, you can enjoy optimal lighting conditions for your aquarium and avoid potential issues associated with outdated or worn-out lights.
Troubleshooting Top Fin Light Replacement
Light Not Turning On
If you’ve recently replaced your Top Fin light and it’s not turning on, there are a few potential reasons for this issue. First, check to ensure that the power supply is turned on. It may seem obvious, but sometimes the simplest solutions are the most overlooked. If the power supply is on and the light still isn’t turning on, there may be a problem with the electrical connection.
Start by checking the wiring connections between the light fixture and the power source. Make sure all wires are securely connected and there are no loose or damaged connections. If everything appears to be in order, it’s possible that the issue lies with the light bulb or tube itself.
Try replacing the light bulb or tube with a new one to see if that solves the problem. It’s also worth checking the compatibility of the replacement light with your Top Fin fixture. Some lights may not be compatible with certain fixtures, so double-check the specifications before making a purchase.
If none of these steps work, it may be necessary to consult a professional electrician or contact Top Fin customer support for further assistance.
Uneven or Patchy Lighting
Uneven or patchy lighting can be frustrating, especially if you’re trying to create a visually appealing and healthy environment for your aquarium inhabitants. There are a few possible causes for this issue, and addressing them can help improve the overall lighting quality.
One common cause of uneven or patchy lighting is the placement of the light fixture. If the fixture is too close to the water surface, it can create bright spots and shadows. Adjusting the height or angle of the fixture can help distribute the light more evenly across the tank.
Another factor to consider is the type of light bulb or tube you’re using. Some bulbs or tubes may emit light in a specific direction, resulting in uneven lighting. Choosing a bulb or tube that provides a wider angle of light dispersion can help alleviate this issue.
Additionally, the condition of the light fixture itself can impact the quality of lighting. Over time, dust, algae, and other debris can accumulate on the surface of the fixture, reducing the amount of light that reaches the tank. Regular cleaning and maintenance of the fixture can help ensure optimal lighting conditions.
If you’ve tried adjusting the placement of the fixture, using a different light bulb or tube, and cleaning the fixture, but the lighting remains uneven or patchy, it may be worth considering a different type of lighting system altogether. LED lights, for example, are known for their ability to provide more uniform and customizable lighting.
Light Overheating or Emitting Strange Odors
If you notice that your Top Fin light is overheating or emitting strange odors, it’s important to address the issue promptly as it may indicate a potential fire hazard or electrical problem. Overheating can damage the light fixture itself and pose a risk to the safety of your aquarium and its inhabitants.
One possible cause of overheating is a faulty or mismatched light bulb or tube. Different light fixtures have specific wattage recommendations, and using a bulb or tube with a higher wattage than recommended can cause excessive heat buildup. Check the specifications of your light fixture and ensure that you’re using the appropriate wattage.
Another potential cause of overheating is poor ventilation around the light fixture. If the fixture is enclosed or obstructed by other objects, it may not be able to dissipate heat effectively. Ensure that there is adequate airflow around the fixture to prevent overheating.
If you’re experiencing strange odors coming from the light fixture, it may be an indication of a wiring or electrical issue. In this case, it’s crucial to turn off the power supply immediately and consult a professional electrician. Attempting to fix electrical problems yourself can be dangerous and should be left to trained professionals.
Remember, the safety of your aquarium and its inhabitants should always be the top priority. Addressing any issues with your Top Fin light promptly and appropriately will help ensure a healthy and well-lit environment for your aquatic friends.
I have a 29gl top fin start tank. Very common.
Article talks great about how to replace a light, but would love a link to which light to order that fits my Top Fin tank lid.
otherwise this article is useless.